
Since moving from South Africa into our first home together in San Diego last year, I’ve had a lot of fun going ALL OUT during the holidays. My partner is South African (where Halloween isn’t a tradition) and I grew up in California (where Halloween is a pretty big deal), so this time of year is especially fun for me.
Growing up, my mom decked out the house with Halloween decor, so I may have taken a note or two from her and am thrilled to keep the tradition alive.
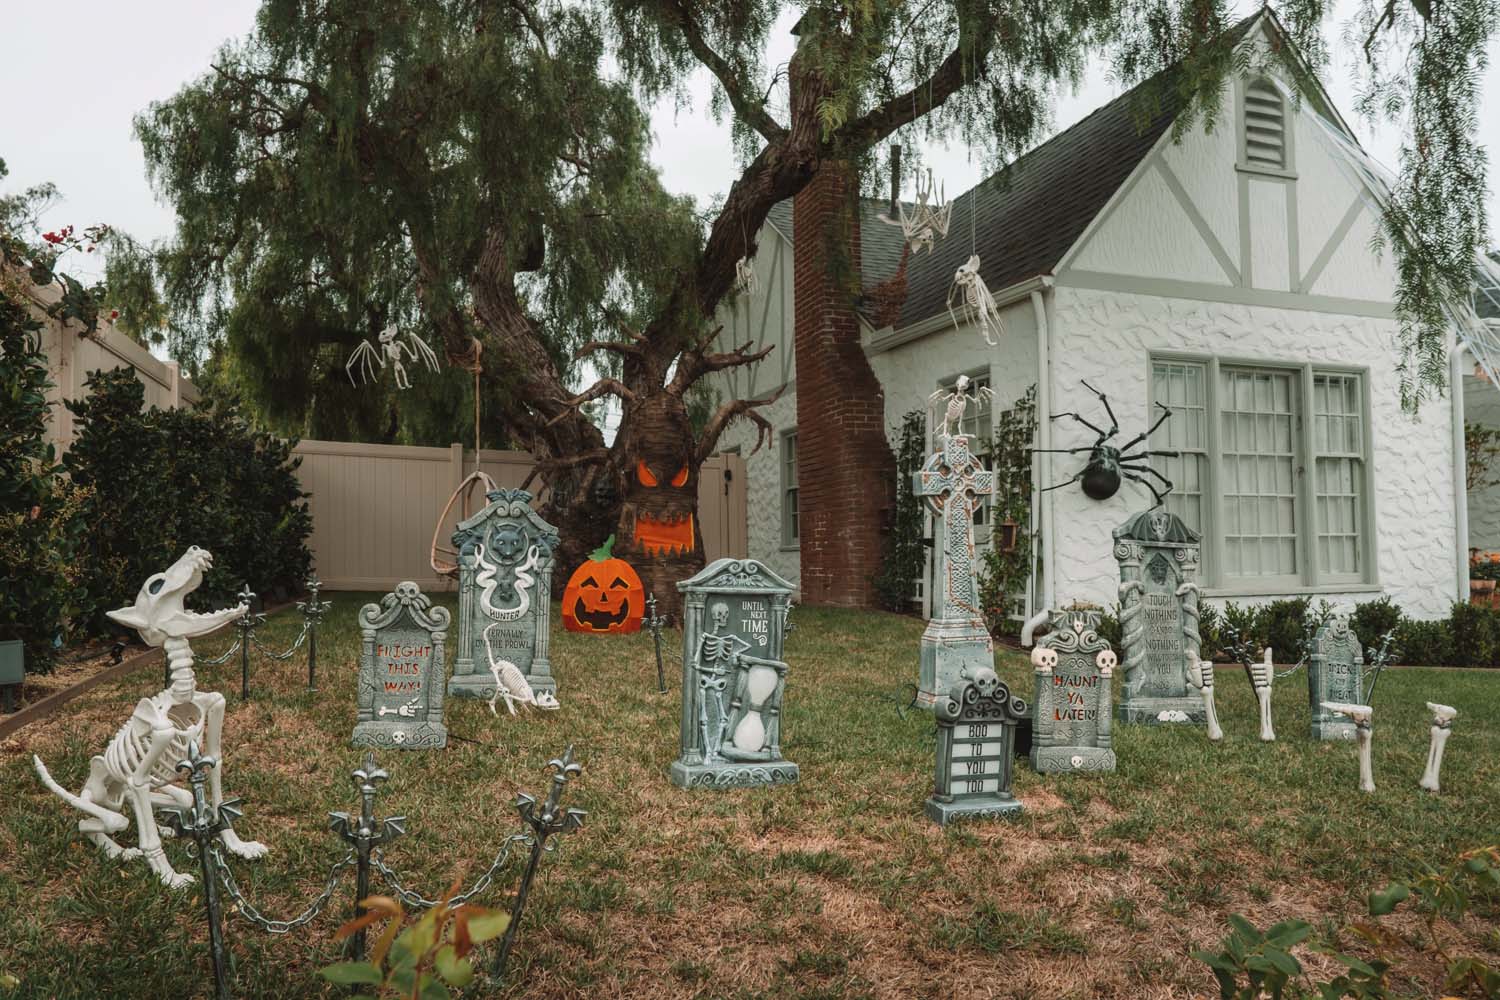
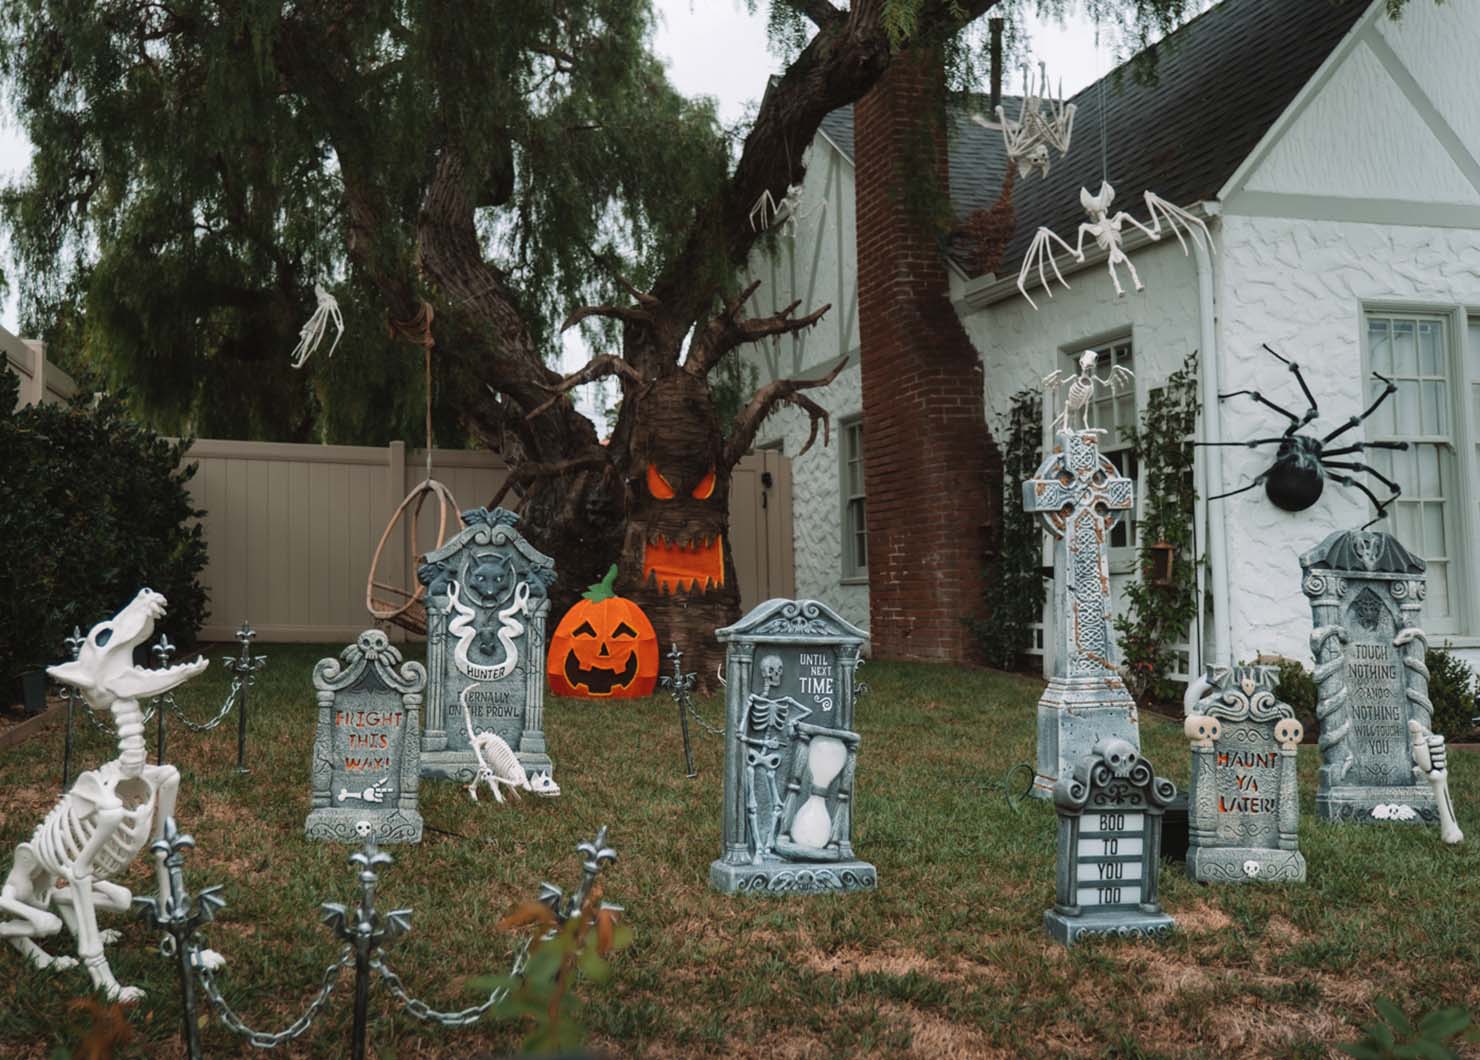
As soon as September comes around, I love to decorate my front porch with cozy fall décor. And then, as we began to shift toward October, it’s ON. We’re talking about a full pet cemetery, a spooky tree, a projector playing creepy videos onto our curtains, and lots of giant spiders.
While we’re being very intentional and conscious about the decor we are adding to our arsenal, this year we went even bigger…and better!
I like to think I run in two modes: summer in Europe or holiday mode — and this time around… we went full pumpkin spice latte. 😉
Without further ado, here are all the gadgets, gizmos, and decor we used to spookify our house — so that you can “boo!”
![]()
Our Spooky Yard
A quick note before we get started:
Make sure everything you’re buying to put outside is meant for the outdoors! There are a couple of things we put outside that are for indoor use only — but we made them waterproof.
For example, all of the tombstones in the graveyard are for indoor/outdoor use, even the giant spiders are indoor/outdoor. The few things that aren’t meant for the outdoors, we bring in every night to avoid any water damage.
I will say that it creates a LOT of work if you aren’t careful, so just keep that in mind as you plan your Halloween scare-scaping.
There are a lot of bits and pieces at play here, so I’m going to break them down, section by section!
Front of the Fence + Gate
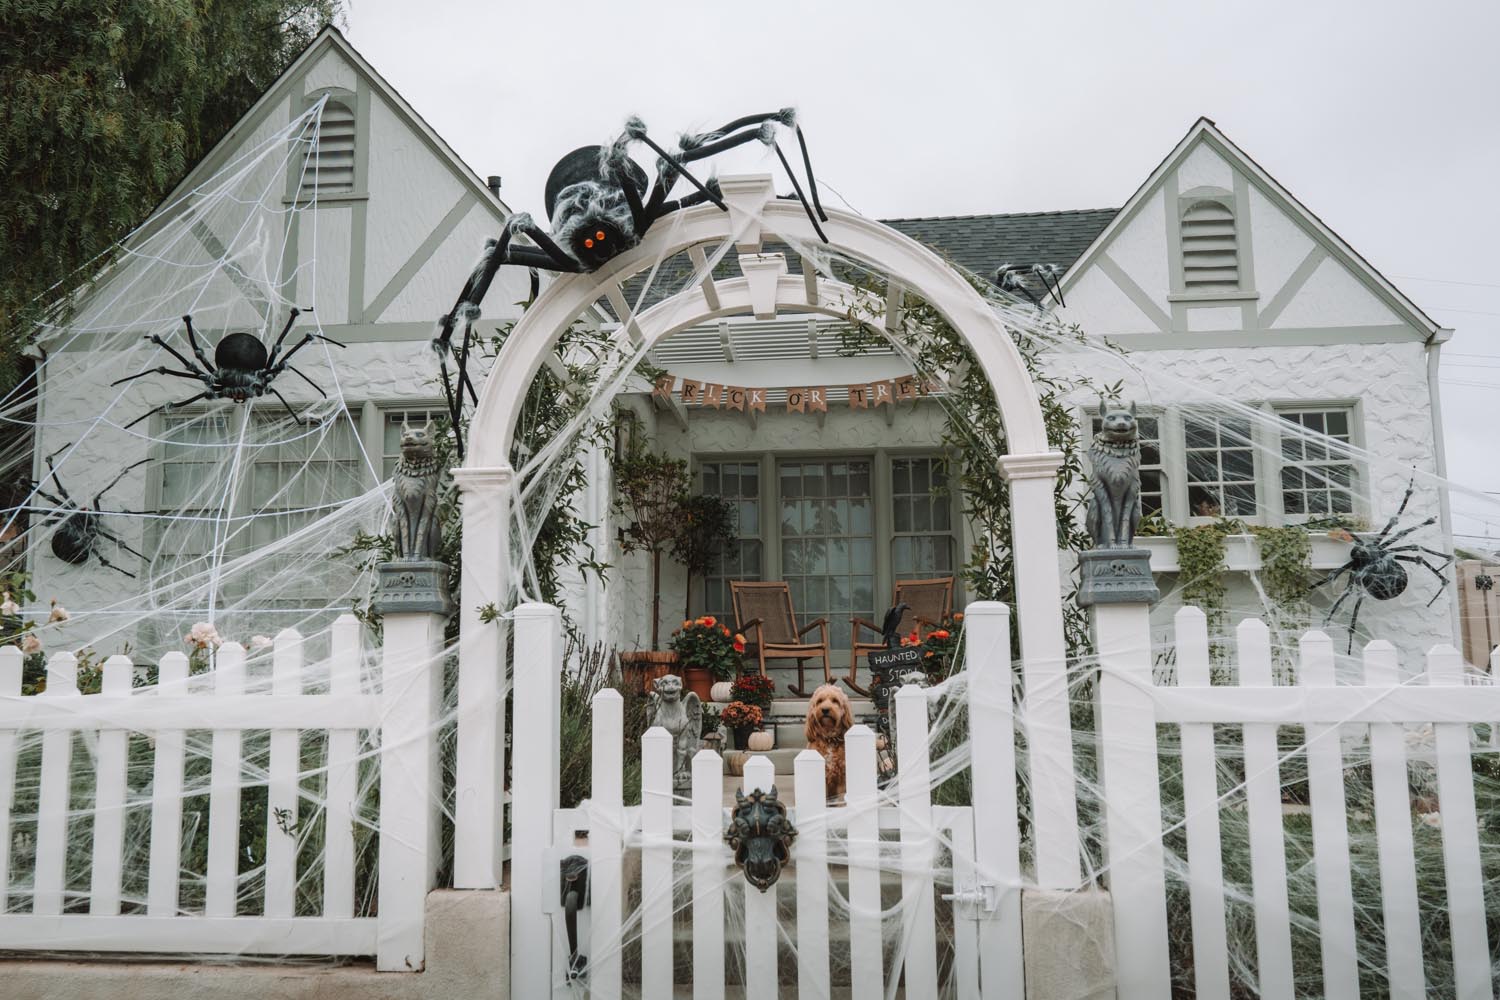
The Fence
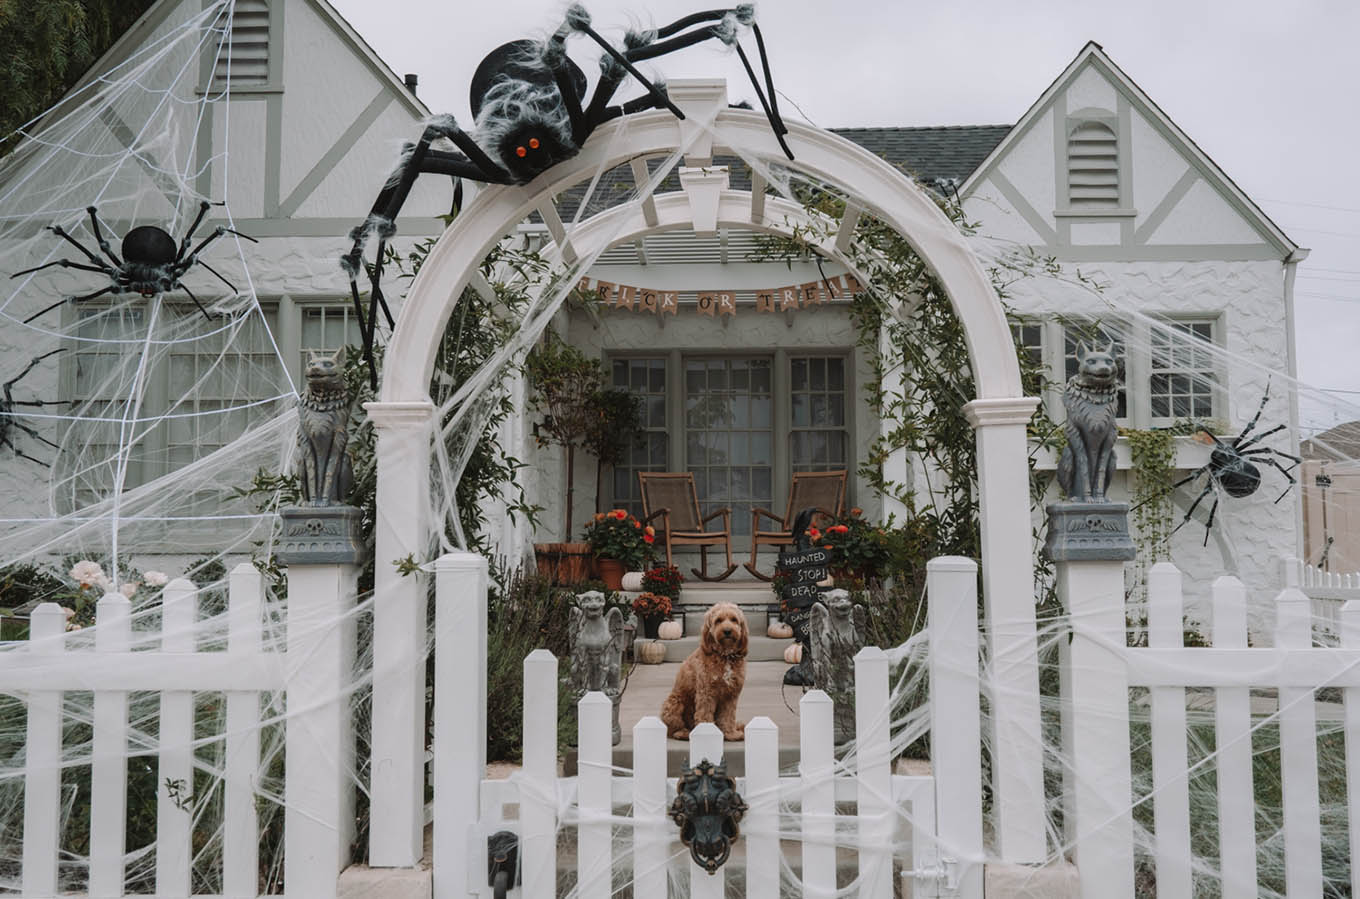
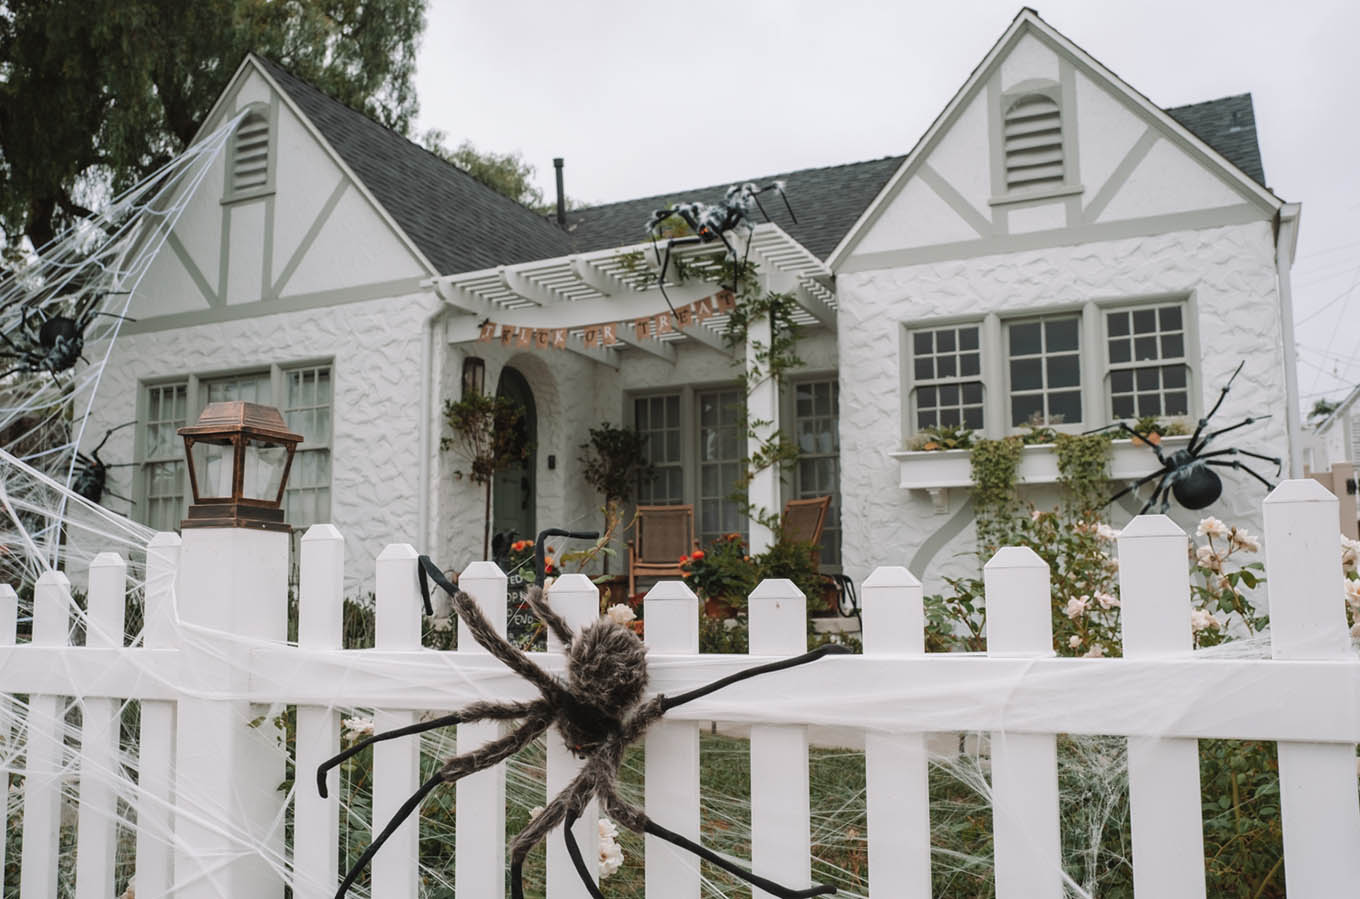
The fence is decked out with stretchy spider webs, smaller spiders, and flickering lanterns. We have 5×5 inch vinyl fence posts on our white picket fence. I popped off the post caps and ordered some 5×5 inch solar lanterns which I think make a HUGE difference in the overall “spook” effect. After the holidays, I can pop off the lanterns and put the normal vinyl caps back on.
- Stretchy Spider Webs — We used about 4 packages
- Giant Spiders
- 3-Foot Spider Black (2)
- 3-Foot Spider Brown (2)
- Solar Lanterns
Front Gate
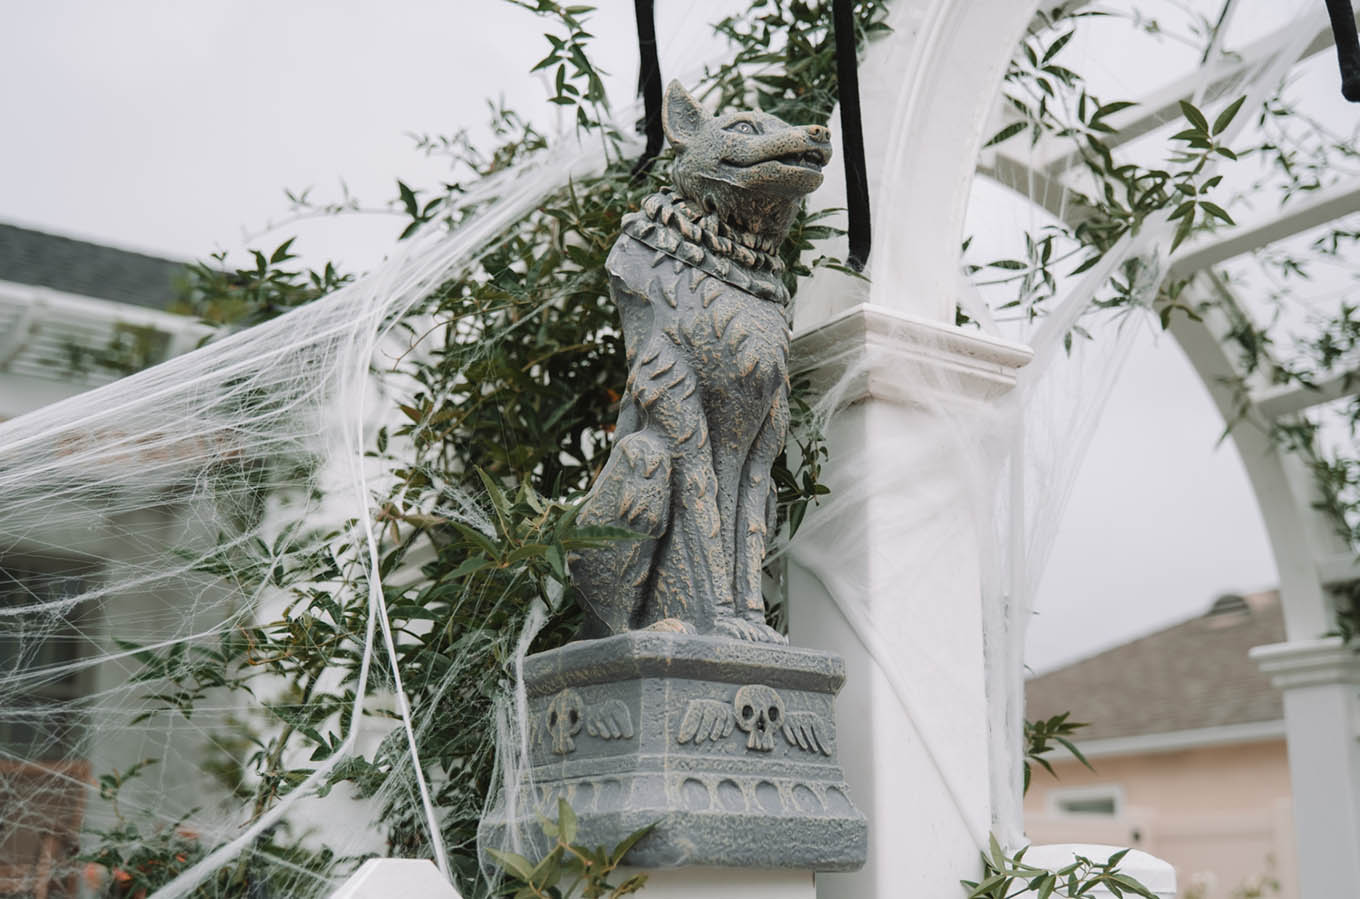
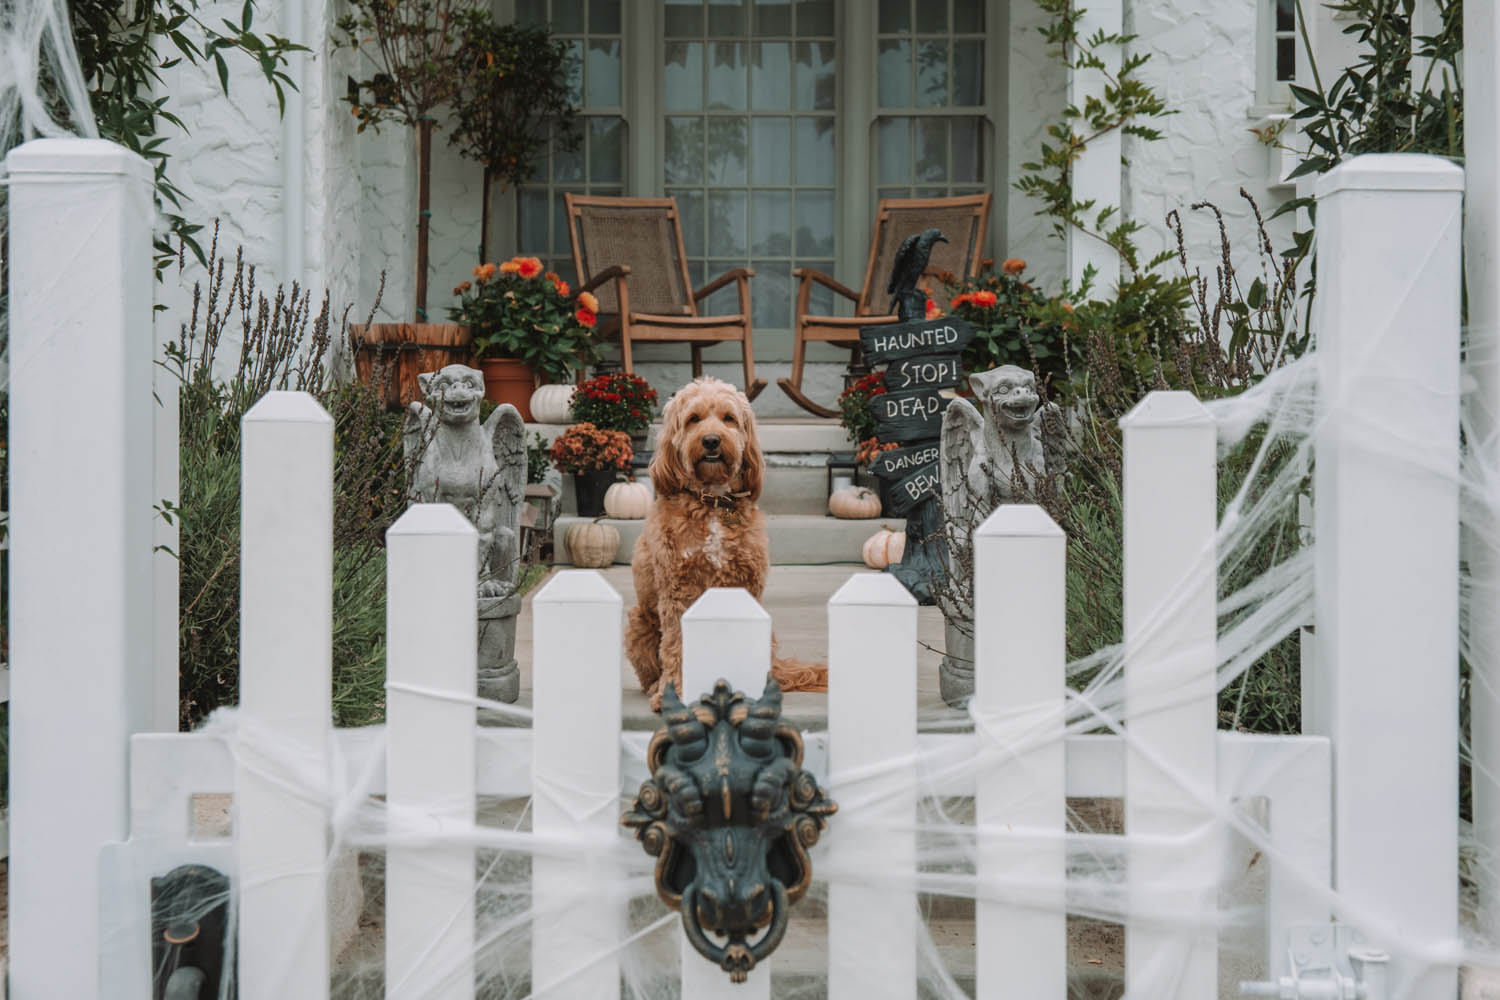
On either side of the front gate, we’ve got howling wolves, as well as a dragon door knocker on the actual gate, and then the arch is topped with a giant spider.
- Howling Wolf (2) — NOTE: These are for indoors only. We used waterproof duct tape over the battery compartment and fit the base inside of the fence post to prevent them from getting wet.
- Dragon Door Knocker — NOTE: This is also for “sheltered” outdoor/indoor. I created a loop with a zip tie so that I could easily slide it on and off the gate if rain is in the forecast. This knocker is a HUGE hit with the neighborhood and a great deal for only $15. It’s noise activated so when someone is near, its eyes glow red and the animated knocker moves back in forth. It even has 3-4 spooky audio recordings!
- Giant Spider — We attached this spider to our arbor with zip ties
Shop Here!

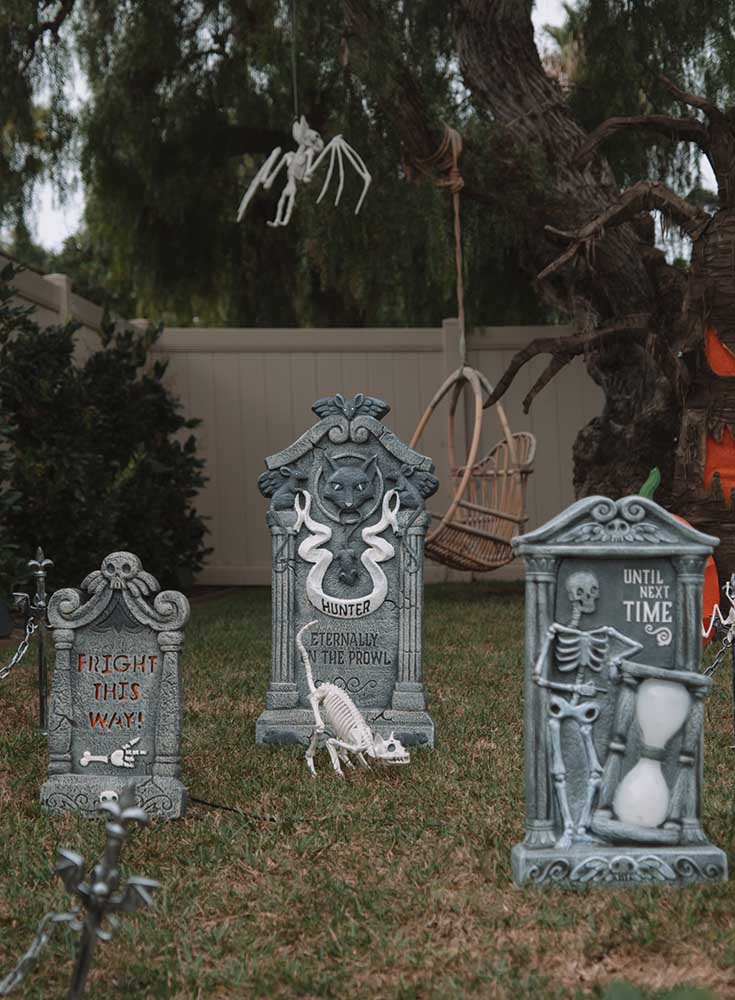
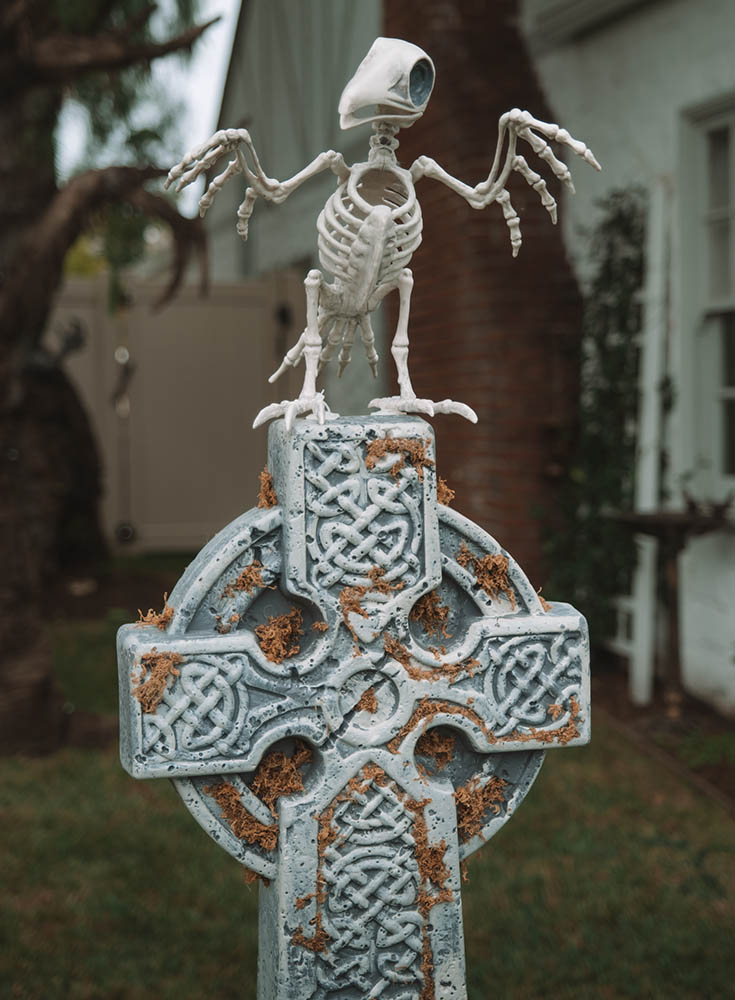
The Cemetery
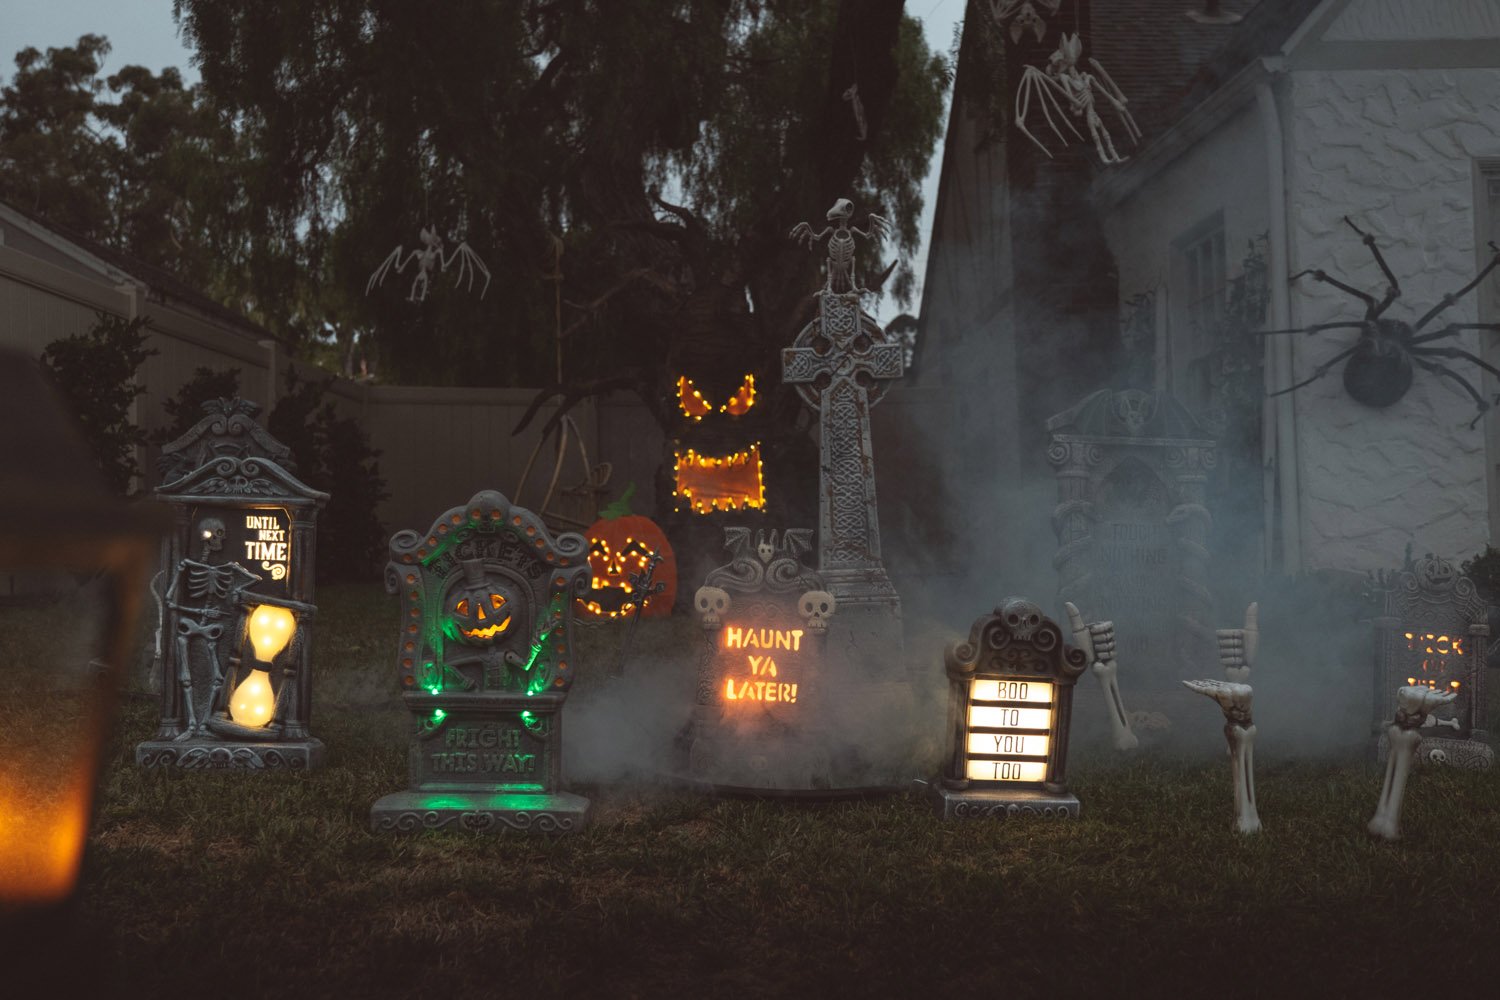
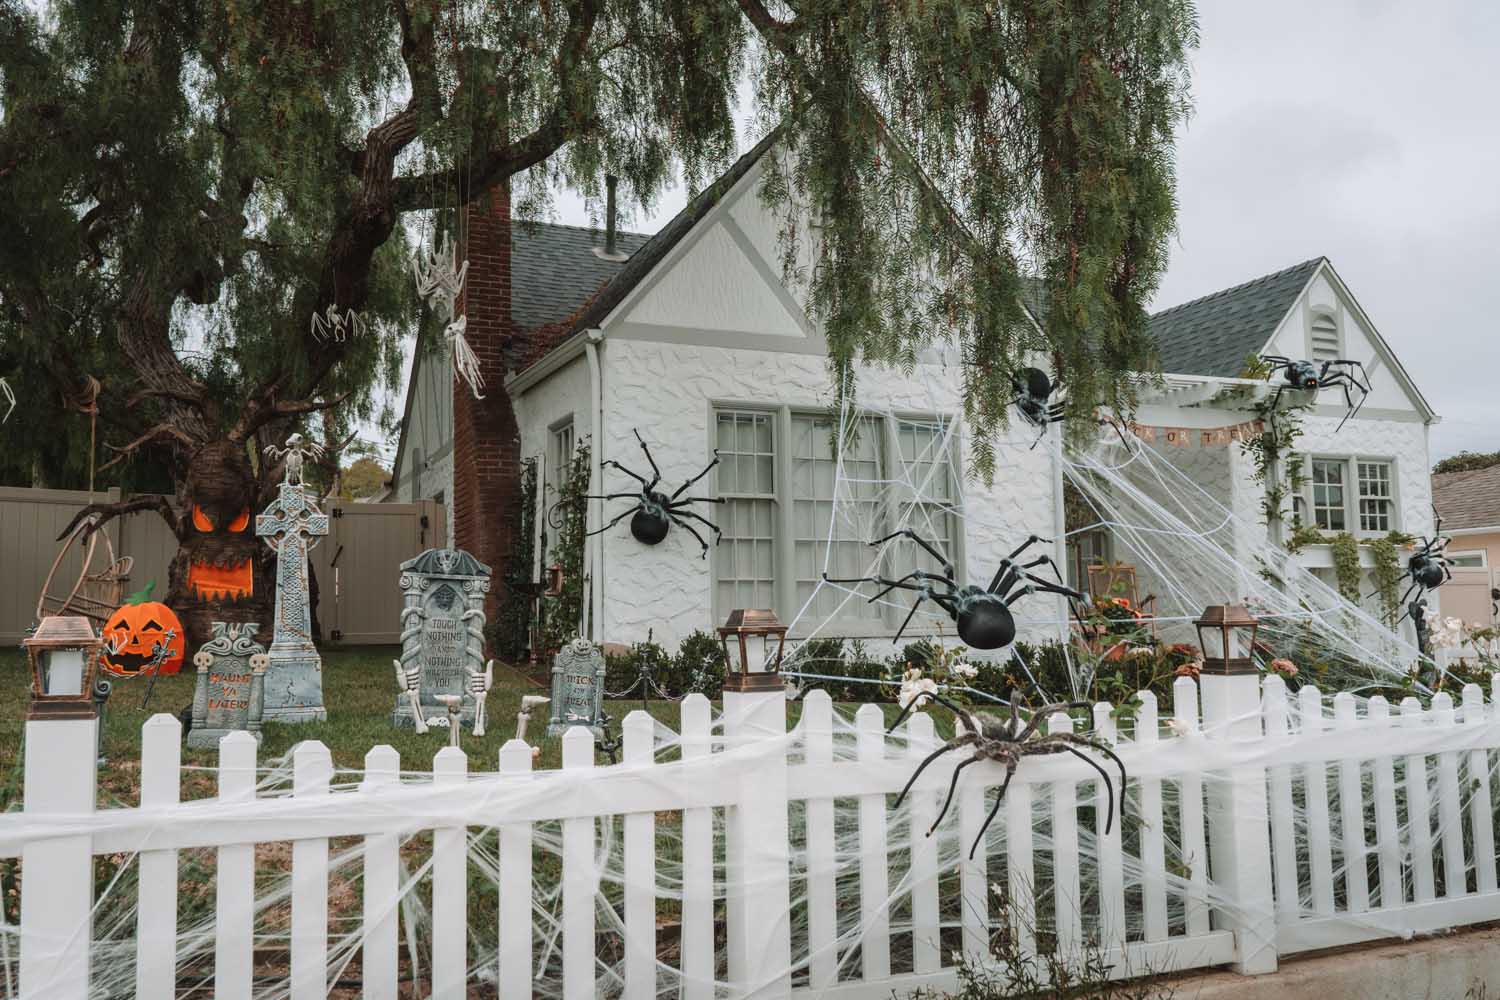
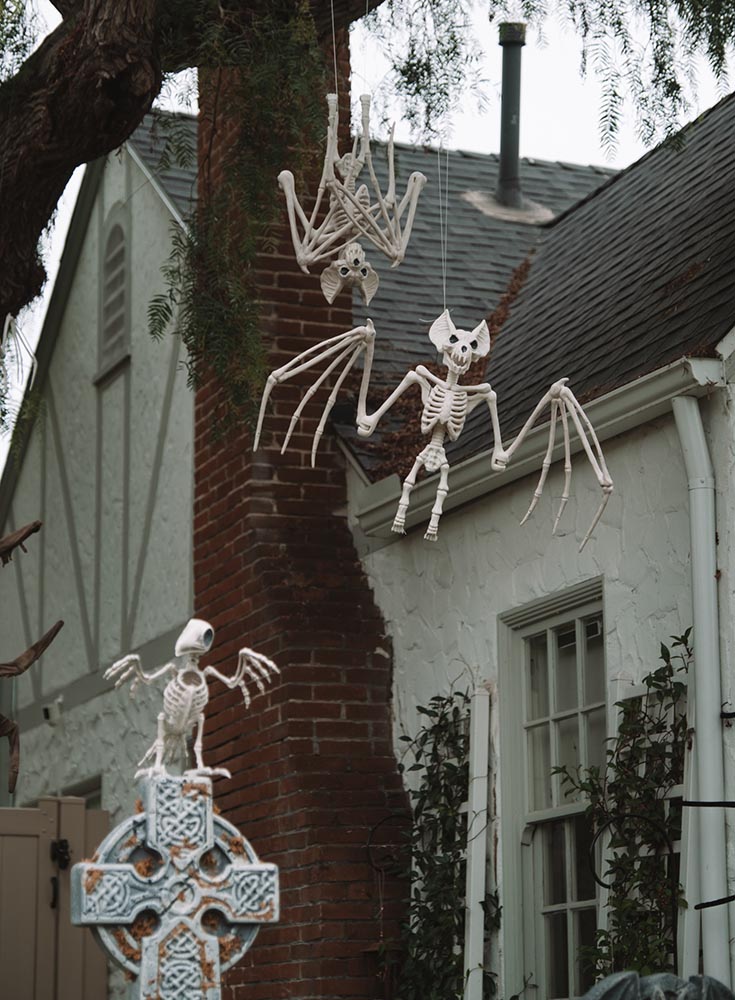
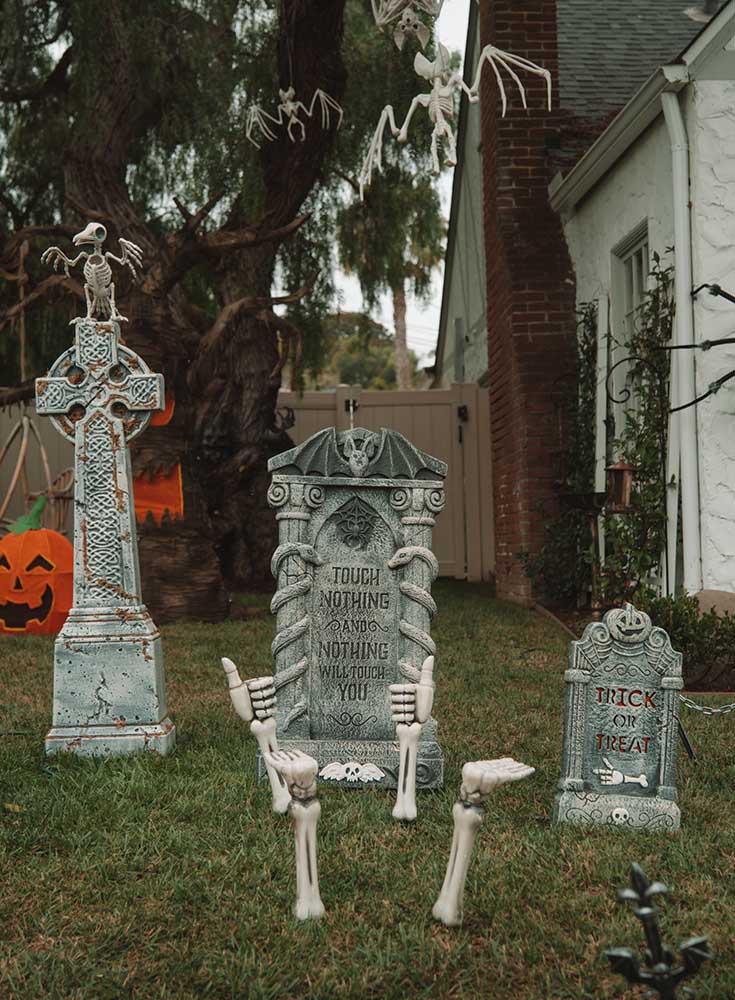
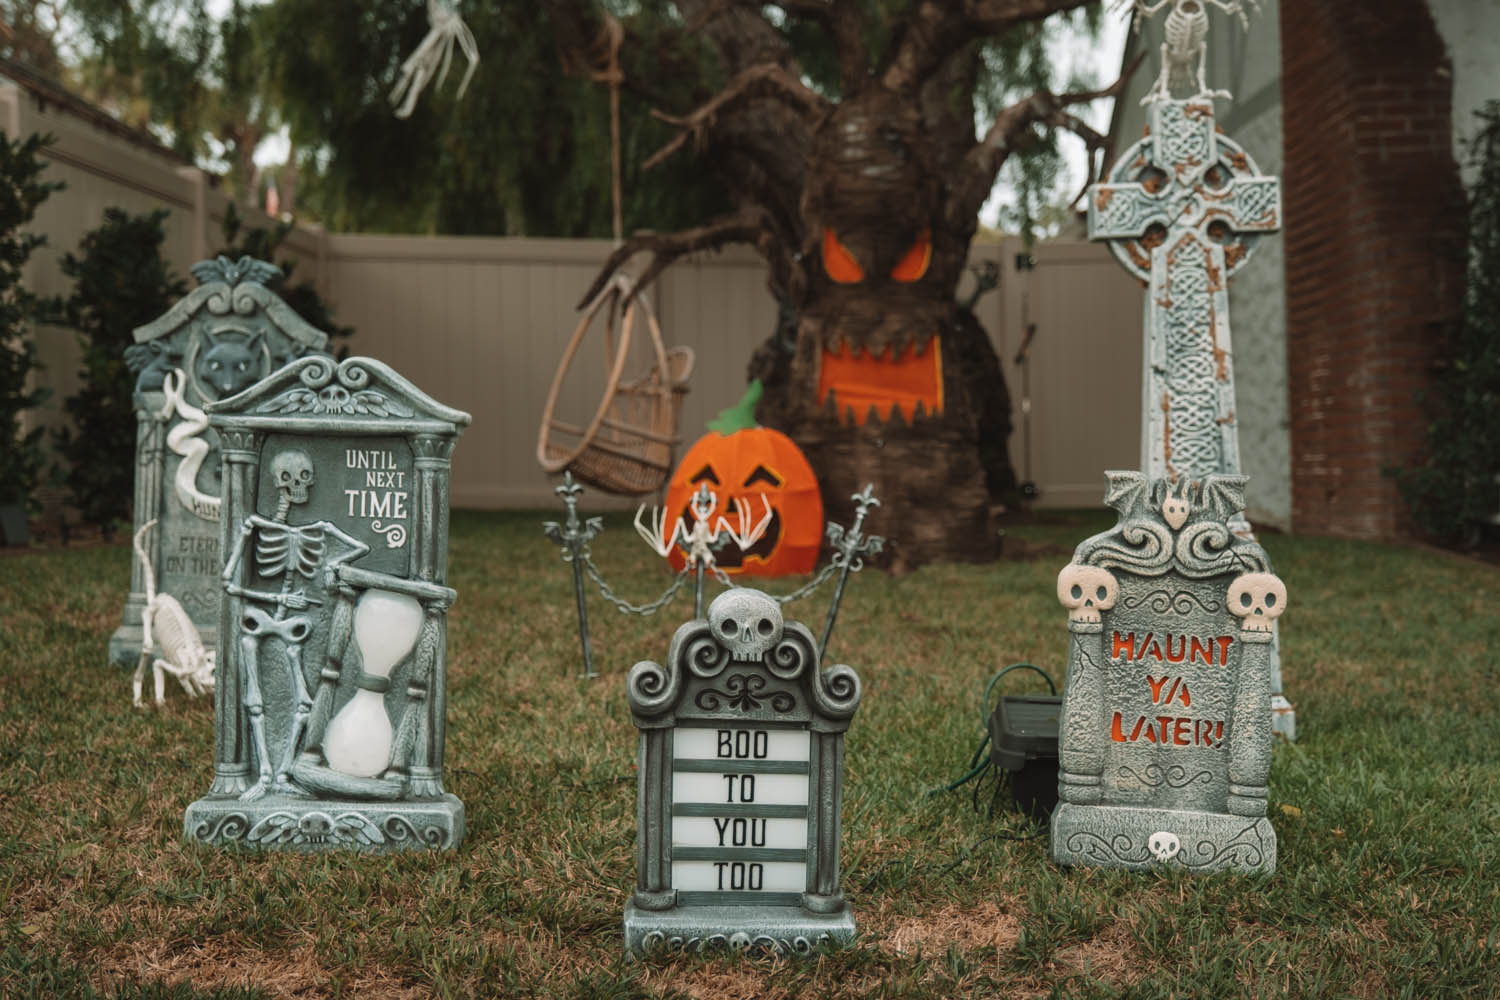
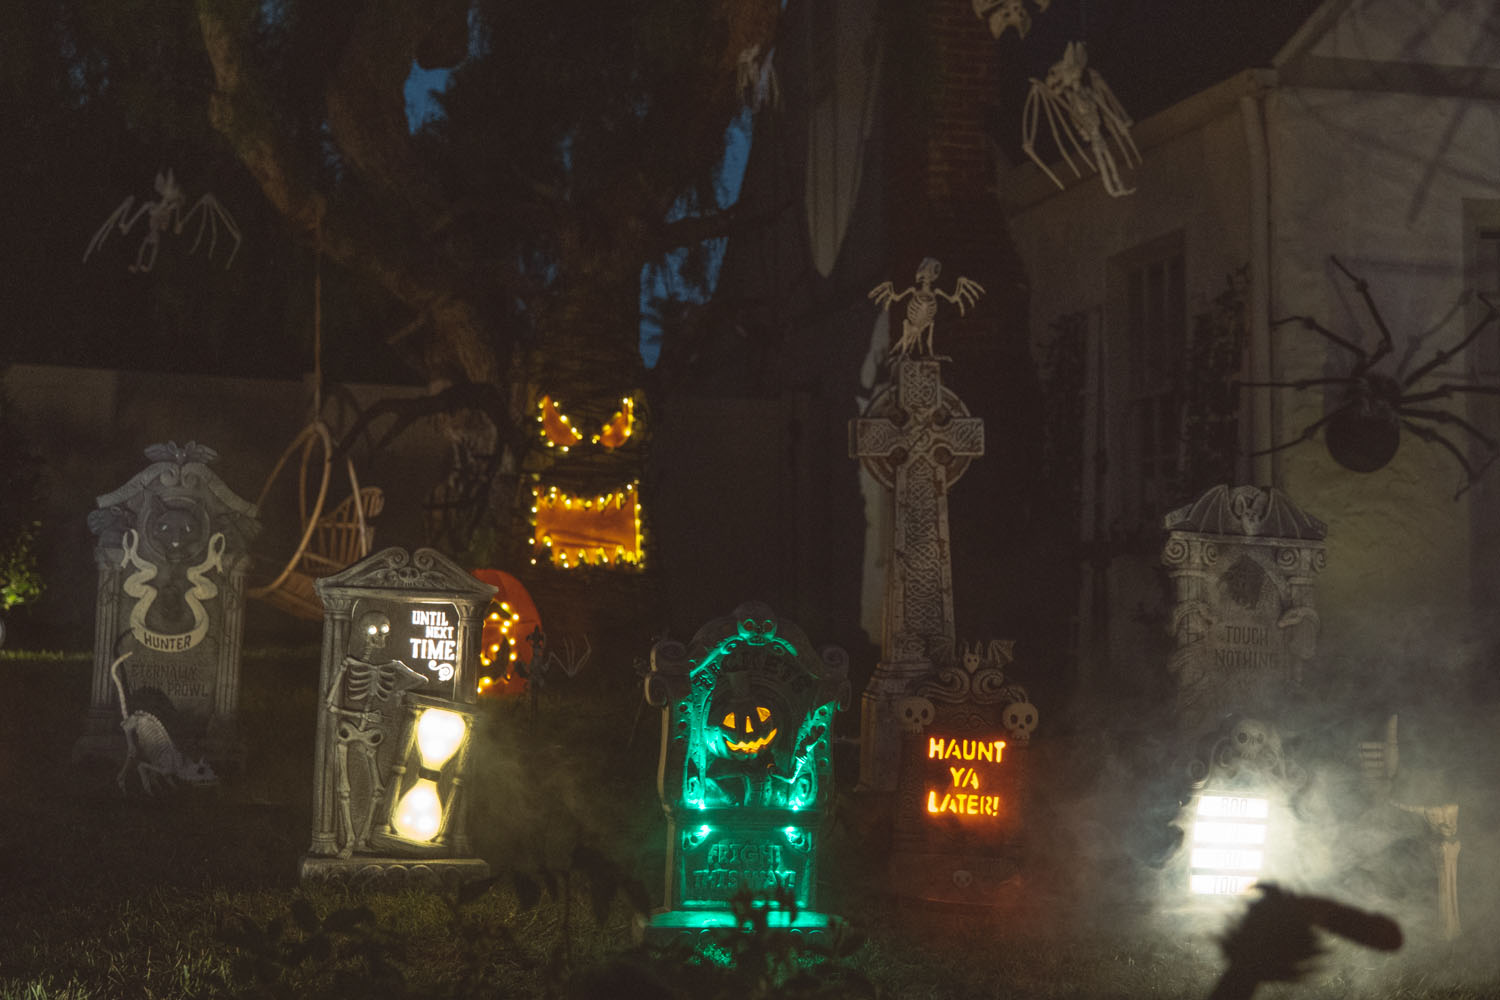
The pet cemetery might just be my favorite part! While it’s fun during the day, it really comes to *life* at night when everything glows and we get the fog machine going.
- Grave Stones: Fright This Way, Hunter Terminally on the Prowl, Until Next Time, Boo to You, Haunt Ya Later, Touch Nothing Nothing Will Touch You, Trick or Treat
- Cat Skeleton
- Skeleton Wolf
- Raven Skeleton
- Celtic Cross
- Skeleton Thumbs Up & Skeleton Feet
- Bat Gravestone Fencing
- Small Bat Skeleton (1)
- Large Bat Skeleton (3)
- Spooky Tree and Pumpkin — Home Depot but from last year (unfortunately I can’t find these pieces online — I got them the week of Halloween on clearance)
- Fog Machine — Setup Explained in Section Below
Shop Here!

Spider & Spiderweb on the House
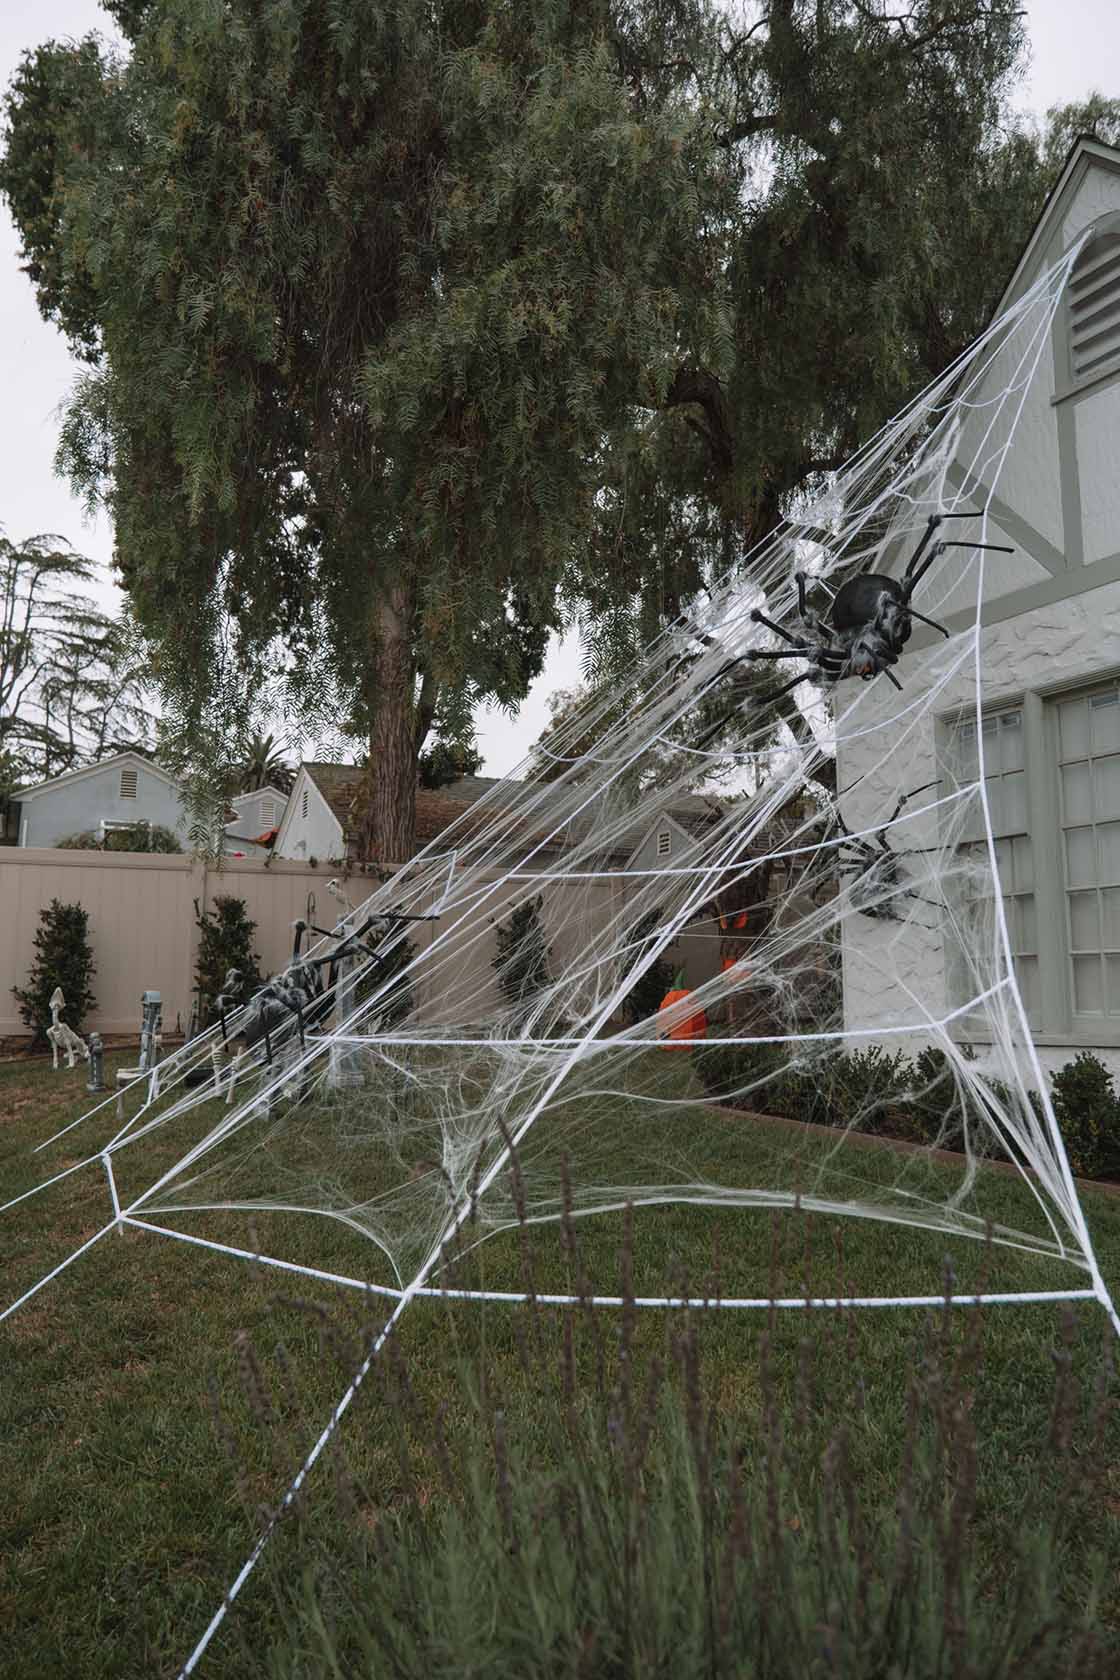
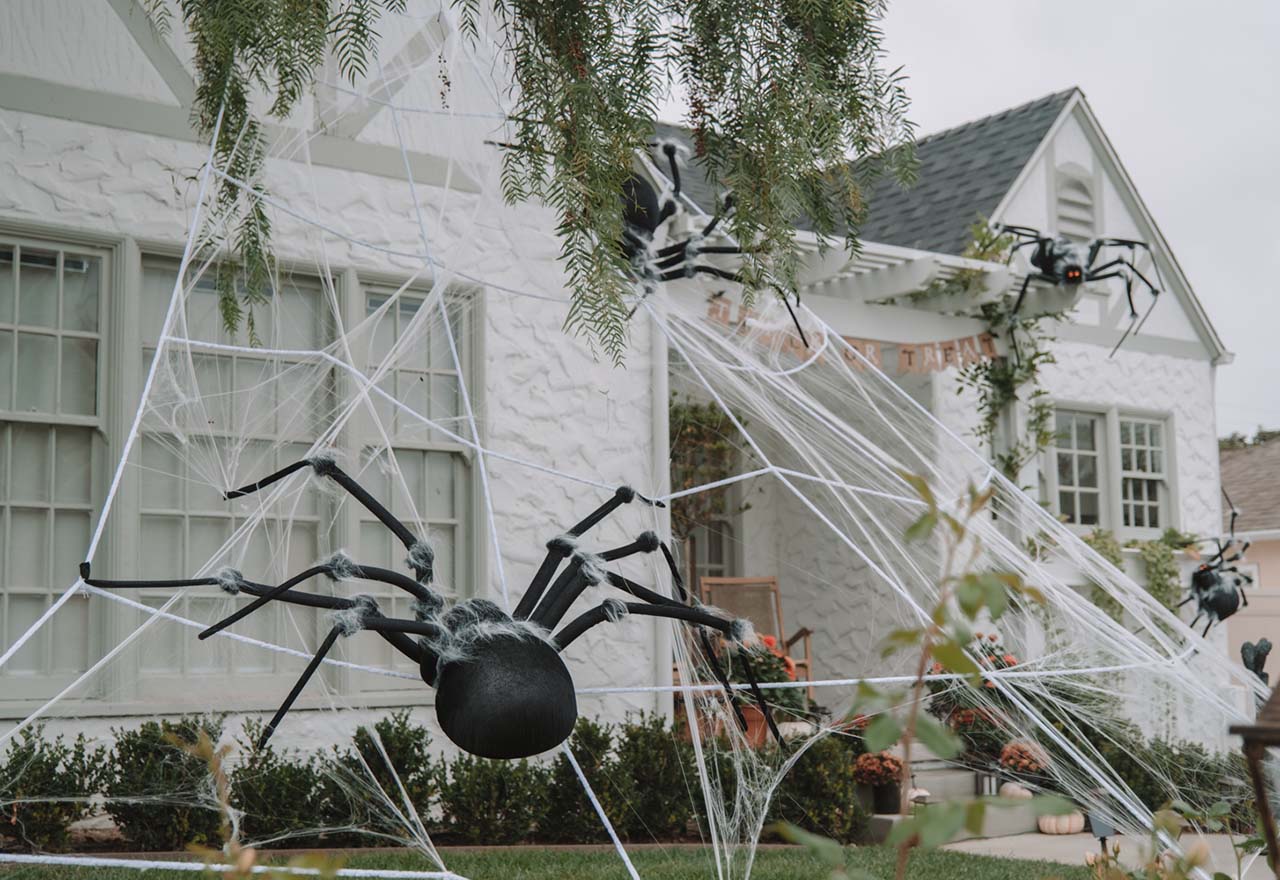
For the big spiders that we attached to the house, we used square zippy stick tie mounts along with zip ties.
We did about 4 mounts per spider, with two front legs, and two of the back/under legs, so that there were multiple mounting points to support the weight. While it’s not that heavy, we wanted to make sure they were secure.
Be sure to wipe the surface completely and let the mounts cure for a second before attaching anything with weight!
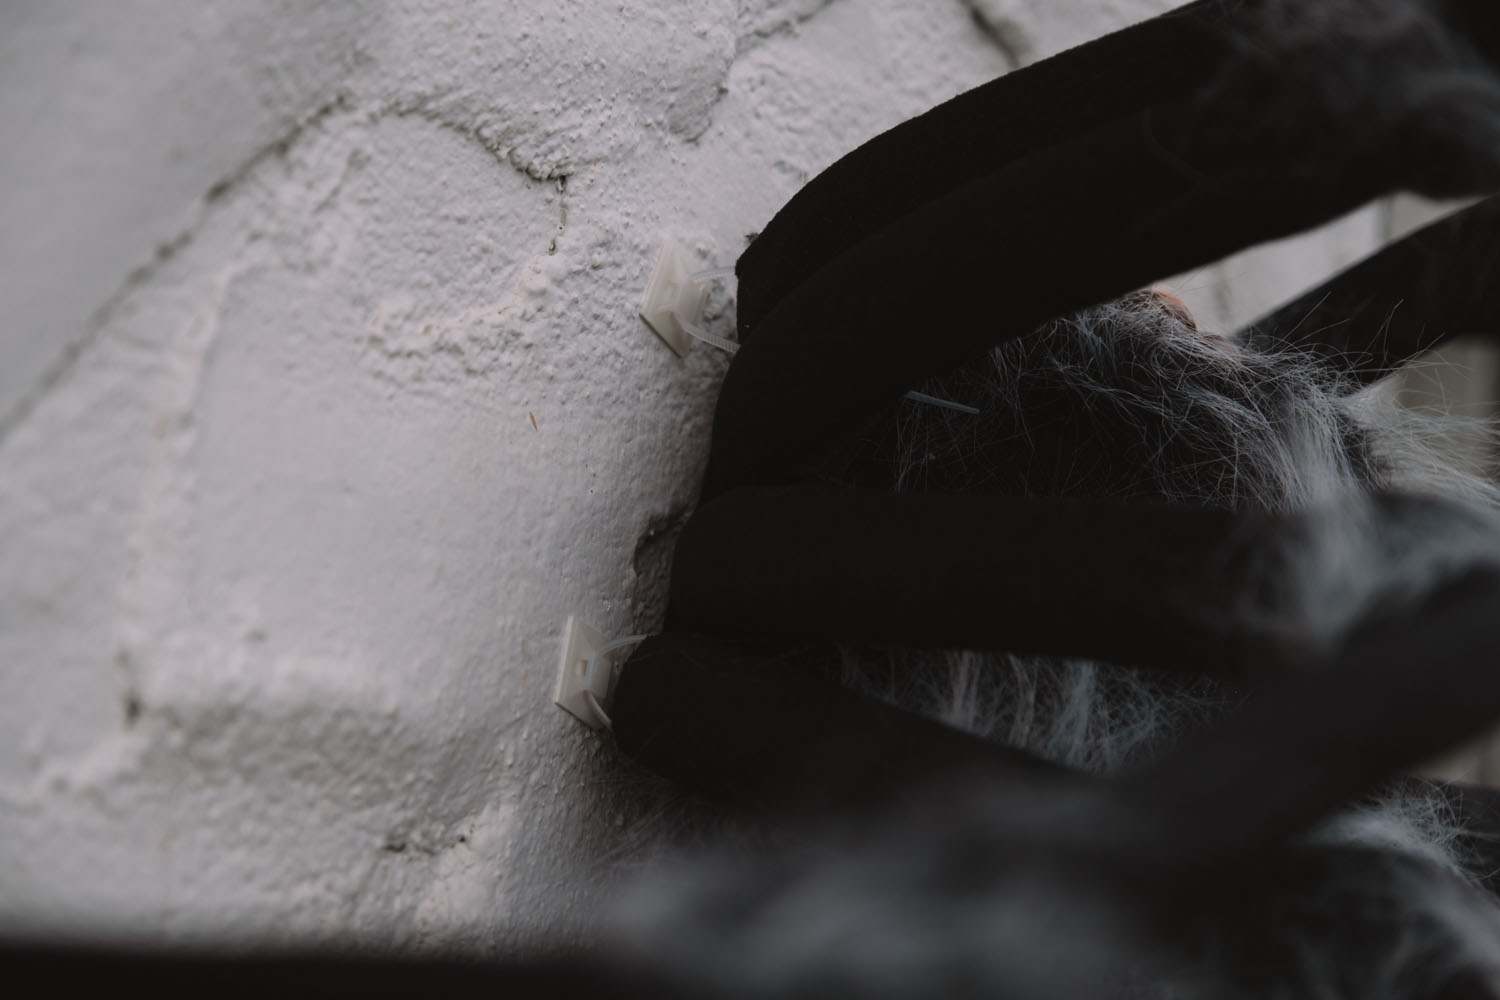
- Giant Spiders — On house and web
- Giant Spider Web — We screwed a hook into the eaves of our home to have a hold point so just be mindful of how you plan to attach the top to your house. It has a lot of tension so I don’t think an adhesive hook would hold up. The web came with stakes to put into the grass to mount the bottom.
- Zip Ties & Mounts
Shop Here!
Helpful Tip:
What I would recommend doing is hooking the yarn web first and then hooking the stretchy spider web on top of that. As you sort of work your way down, weave the stretchy spider web through it — this also helps to support the big spiders.
We attached the spiders on the big web with zip ties. You may need to use some on the legs or body depending on how steep your web is. They’re a bit “butt heavy” so if you’re pointing their heads down, their butts tend to fall forward.
It’s a bit of an experimental process. We only put 2 big ones on the web so it wasn’t too heavy and so far so good. We’ll see how they go through the month of October!
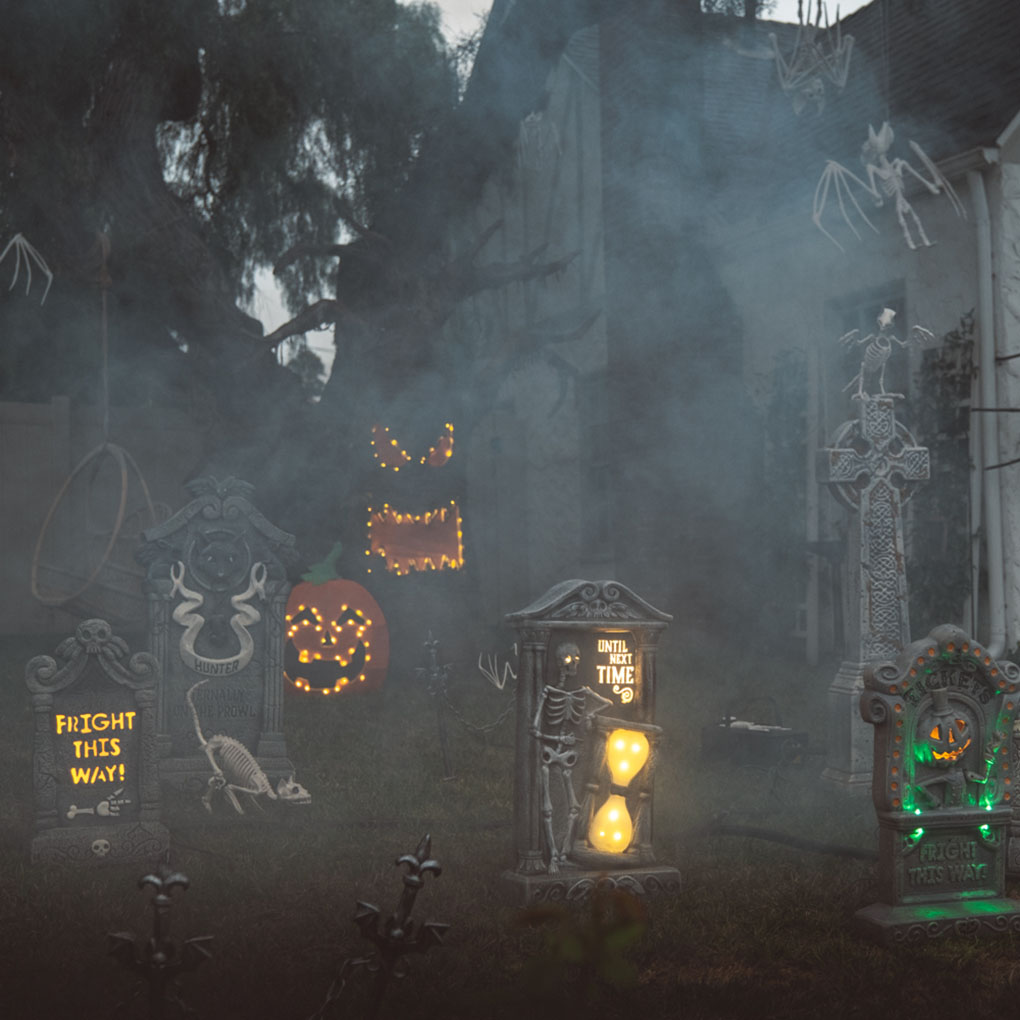

Fog Machines
We have two fog machines. We use a large one for the cemetery and I have the timer accessory as well as a tube kit. The tube connects to the fog machine and you can run the tube along the base of the tombstones to help disperse the fog. Without the tube, it tends to blast and cover things, which doesn’t work well for the cemetery.
The tubes help keep things low to the ground and spread it out a bit more.
Then, we have a smaller fog machine that we use on the front porch where we have a projector animation in the window. This one has lights and I usually use the green light.
- Fog Juice
- Fog Hose Tube Kit — Cemetery
- Fog Machine Timer — Cemetery
- Large Fog Machine — Cemetery
- Small Fog Machine with Lights — Front Porch
Shop Here!
Helpful Tip:
I set the fog machine to run for 10 seconds every 45 seconds. I’ve found that’s a pretty good interval for when people are walking by our house. Everyone will get to see the fog as they pass by.
Another thing to note, as far as I know, they don’t make outdoor-rated fog machines. So we only put the fog machine out on the weekends because it’s a bit more work to bring it in and out every night.
Essentially, the fog machine is not meant to be left outdoors!
![]()
The Front Porch
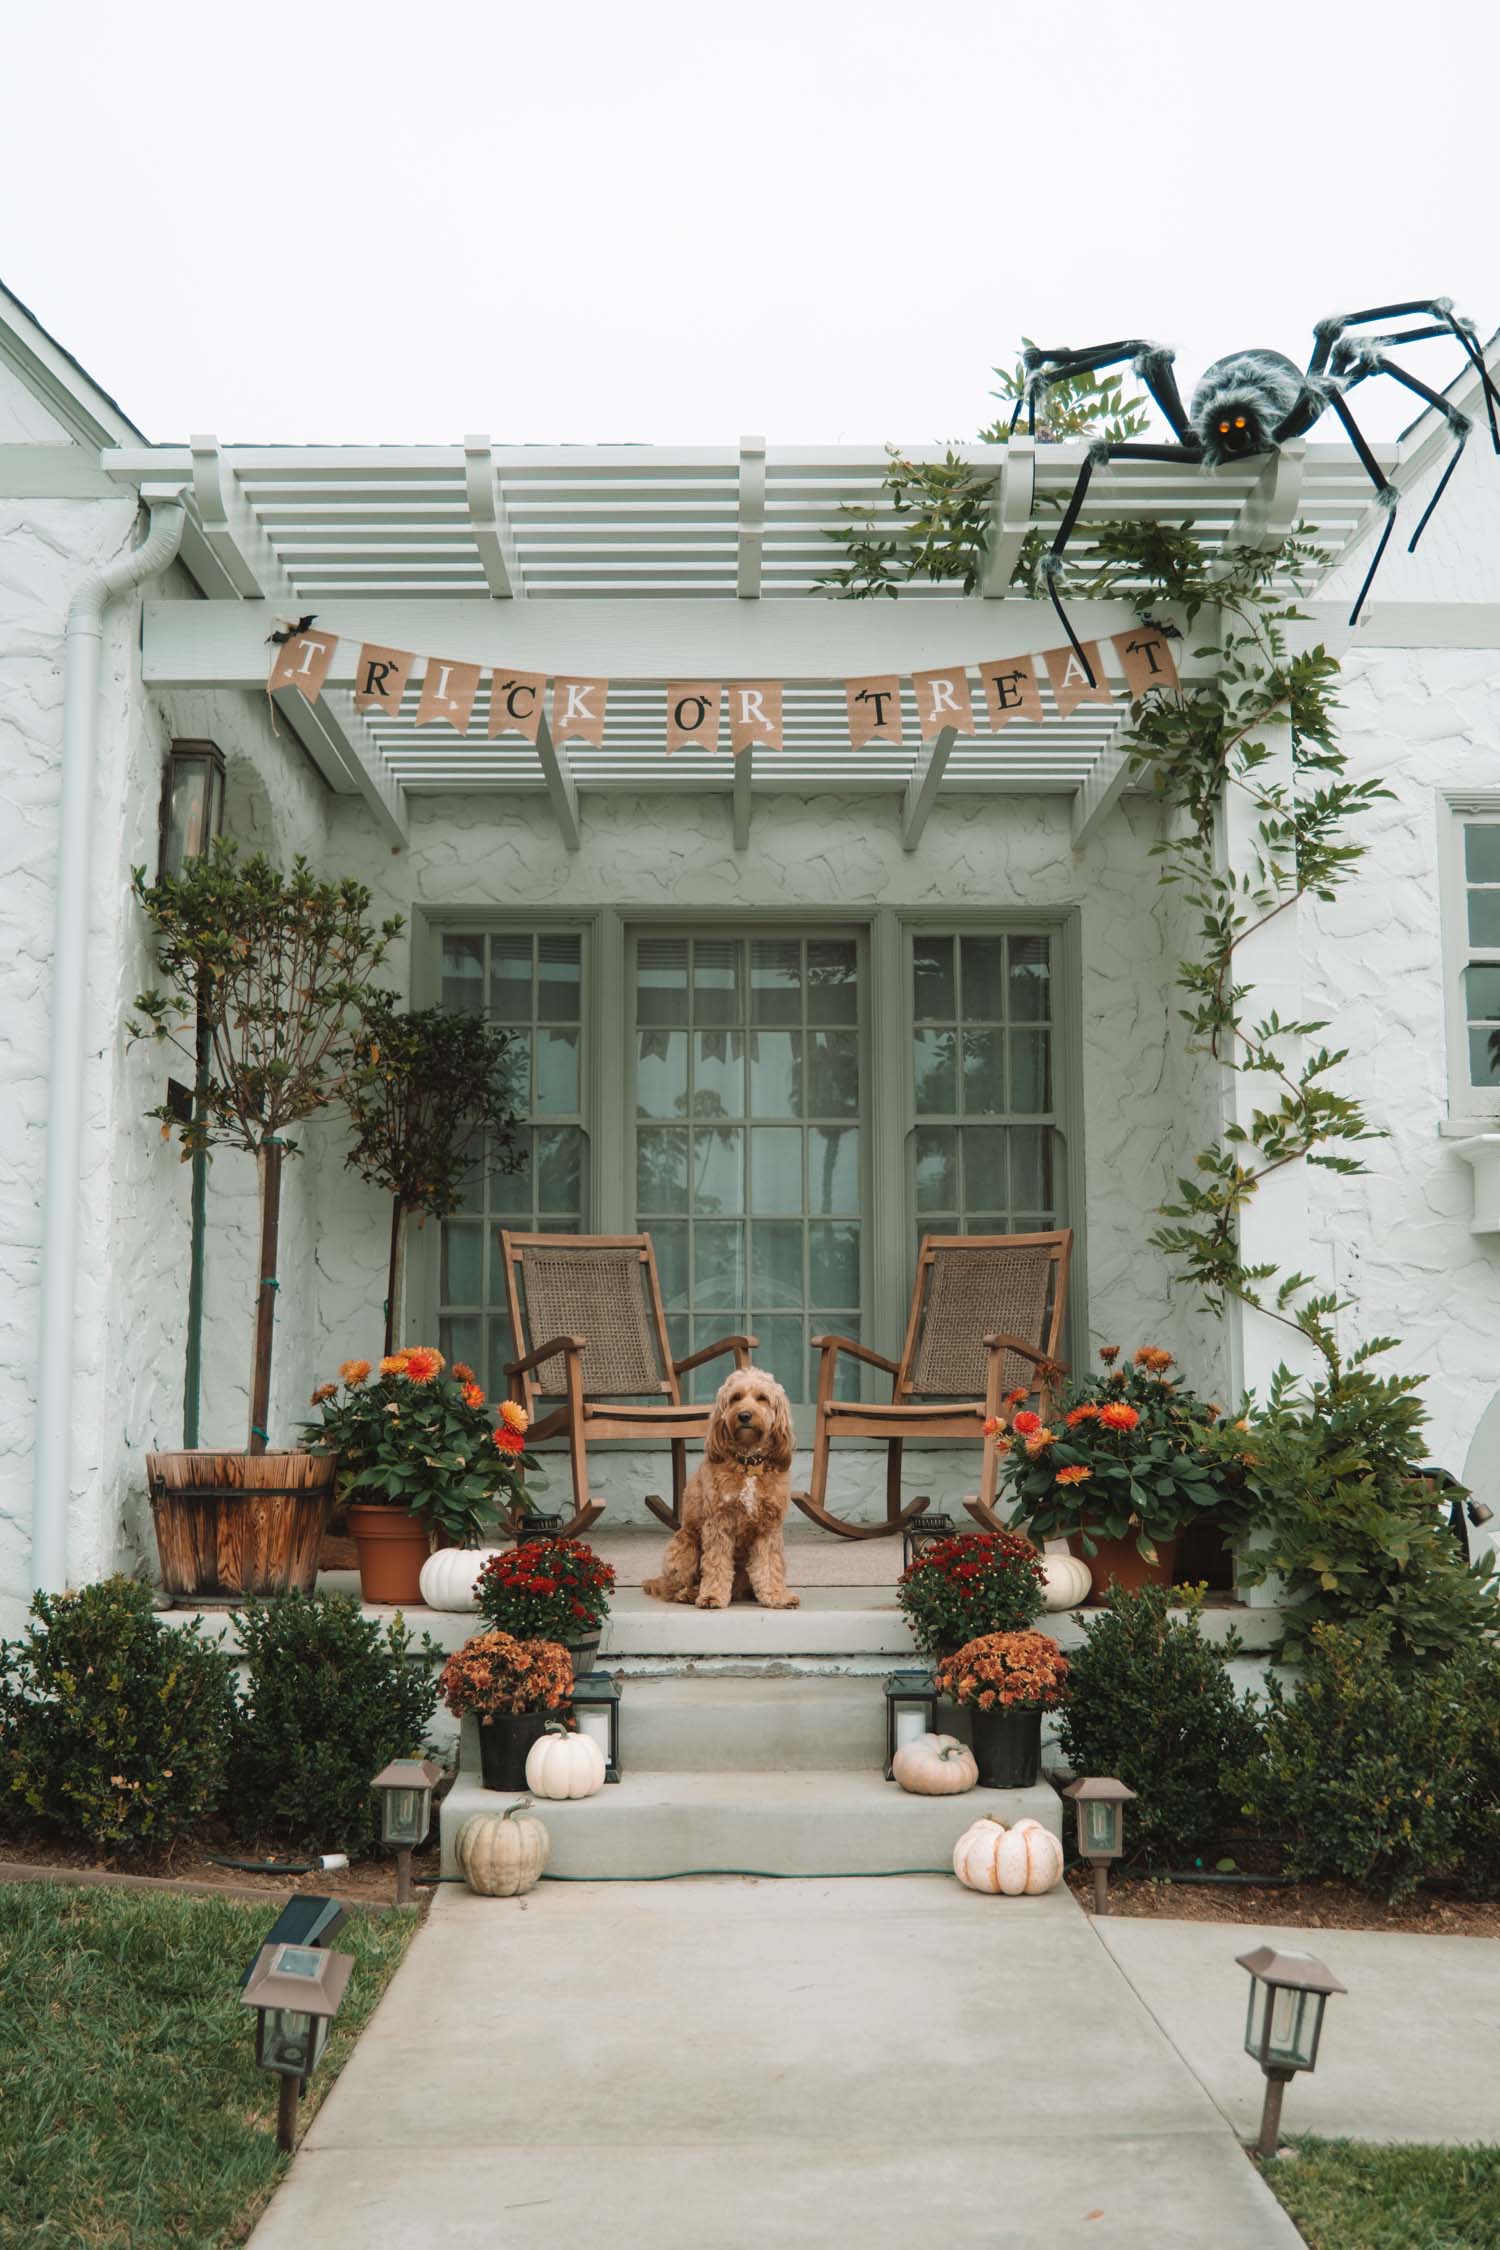
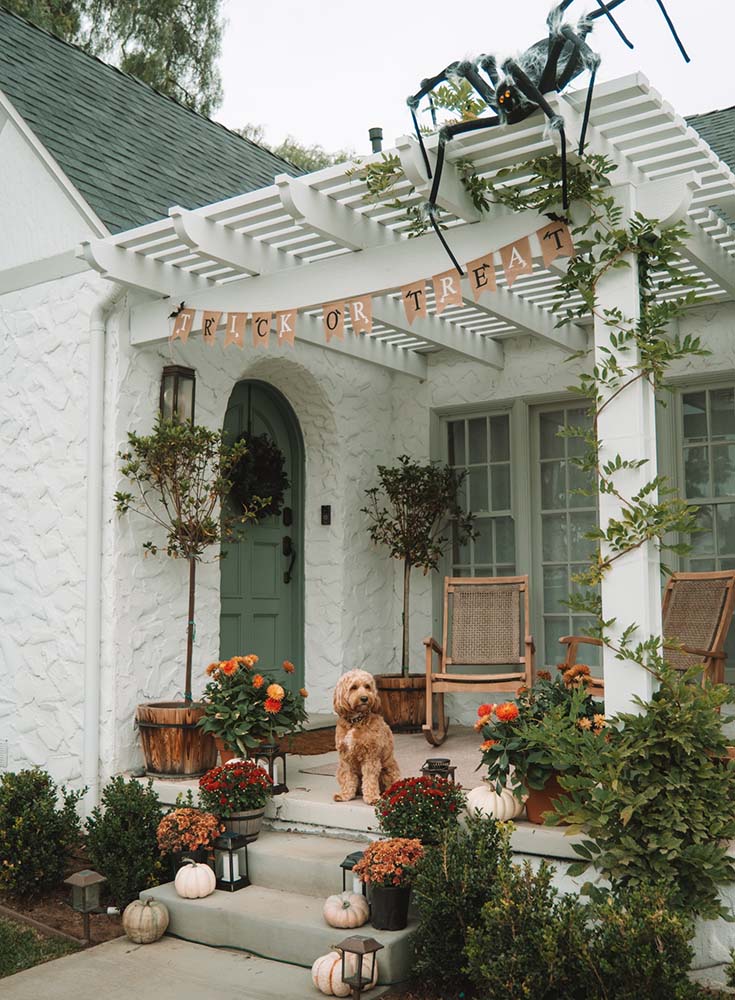
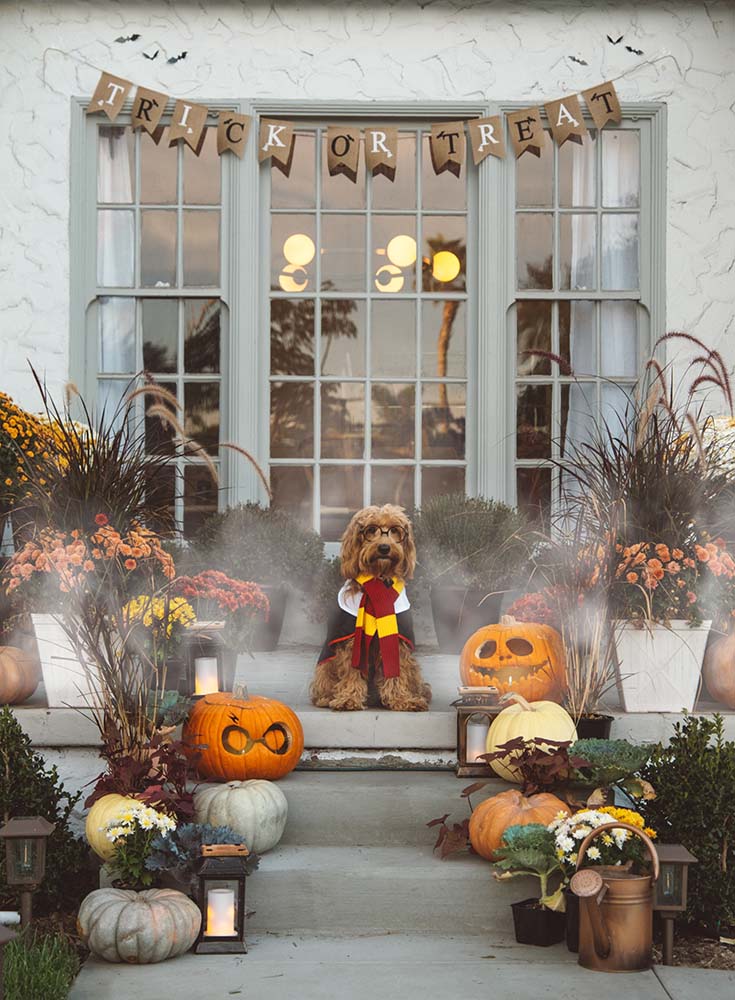
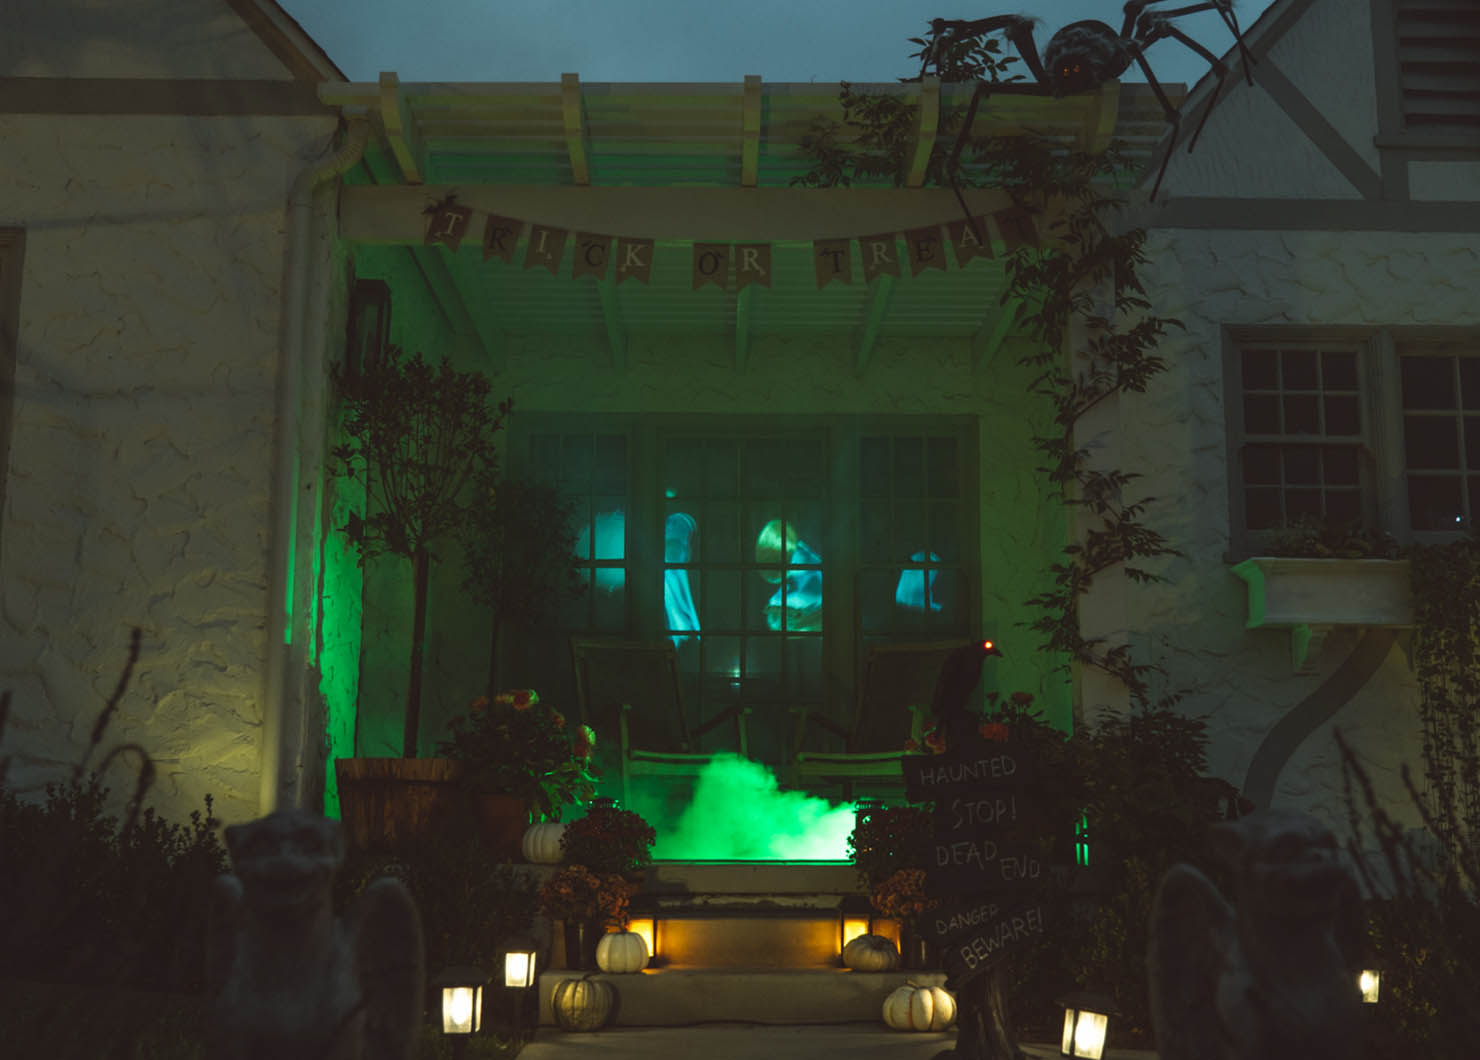
Last year I went crazy with real pumpkins and ornamental cabbage, but they rotted too quickly. So, this time, around we opted for fake pumpkins and I think they look just as good!
I decorated the stairs with two types of potted mums and potted Firecracker Dahlias from Home Depot. The porch is finished off with four solar lanterns for the evening and a cute “Trick or Treat” banner hanging from the pergola.
On the pathway, we added two gargoyles and a spooky pathway sign to fill the space between the front gate and the porch.
- Haunted, Stop, Dead End Sign — Clearance at Home Goods, no link
- Gargoyles (2)
- Pumpkins on Porch — went with fake pumpkins this year, got them at Michael’s
- Trick or Treat Banner
- Solar Lanterns Version 1
- Solar Lanterns Version 2
Shop Here!
Read More:
![]()

Front Porch Projection
In case you remember our Halloween decor from last year, the projector and front porch animation was one of my favorite things! I have since updated this and am now using a Kodak 350 Luma Projector. It’s a cordless battery-operated small projector that works really well as it sits on our dining room table. We don’t want some huge setup inside our house.
I have it on a compact tripod and project it onto our sheer white curtains in our dining room. These are the curtains that are up year-round, so we didn’t have to change them out. You can basically use any sort of sheer white fabric.
The files are from atmosFX. I have the Boo Crew Collection, Witching Hour, and Jack O’Lantern Jamboree 3. For these, I saved the files I liked onto a USB drive and plugged that into the projector, and it plays the video files directly from there.
- Fog Juice
- Front Porch Fog Machine
- Kodak 350 Luma Projector
- USB Drive
- Bluetooth Speaker
- atmosFX: Boo Crew Collection, Witching Hour, Jack O’Lantern Jamboree
Shop Here!
Helpful Tip:
You could also use the Inshot app on your phone.
The Kodak Projector can connect to a Bluetooth speaker, which is really awesome. I set up the projector inside, connect it to a Bluetooth speaker, and hide the speaker in the yard so it’s closer to the fence and people can hear it better as they pass by.
As always, it’s best to use a waterproof speaker just in case!
The Set-Up / Bringing Everything to “Life”
Cables/Electric Setup
Sometimes the electrical setup is harder than planning the actual decorations, so I wanted to include a little blueprint of how we set up all of the cords and connected it to a smart plug so that everything could be on a timer and controlled from the Alexa app.
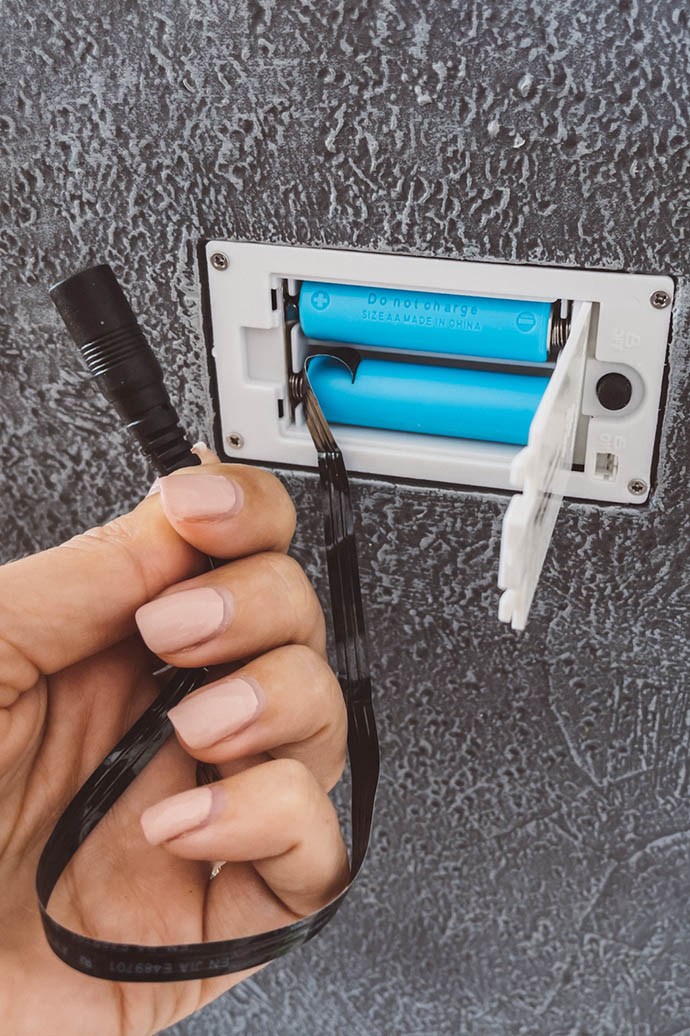
Battery-to-Plug
So many decorations are battery-operated, which is a huge pain in the butt to switch out.
To make the setup as easy and automated as possible, I found a solution to turn battery-operated items into plugs. So, being one that’s all for smart home technology, I found battery-to-plug adapters on Amazon.
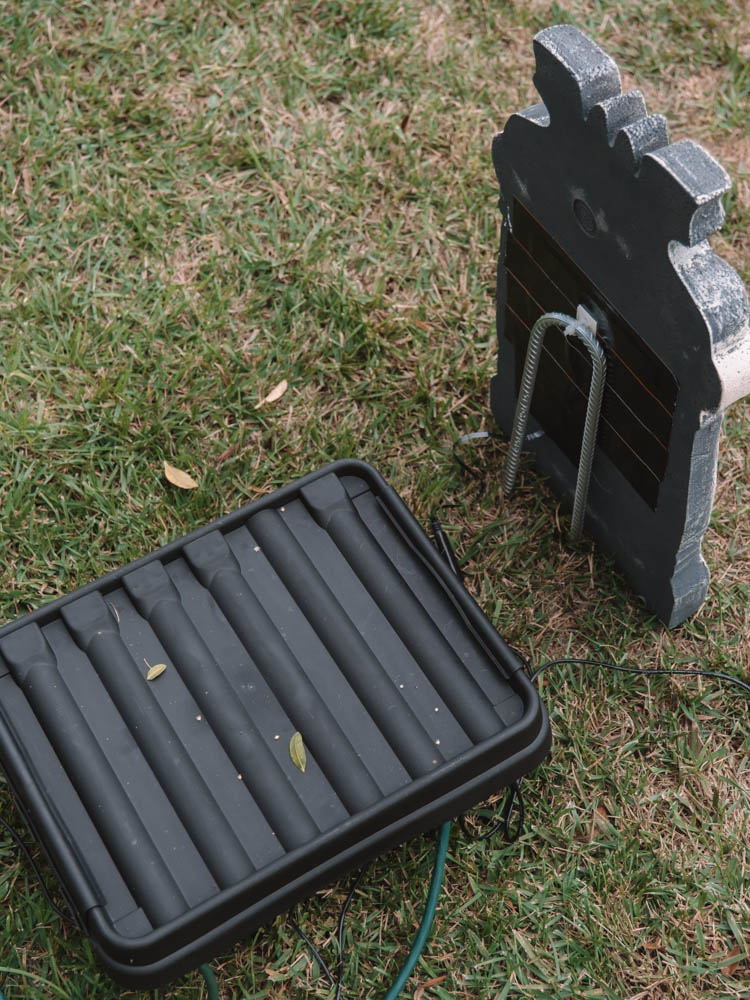
They sell single and 3-plug adapters; since we had six light-up cemetery items, we used two of the 3-plug adapters. You basically pull out the batteries and pop in a cable battery and you run it to the plug point.
Extension Cords/Smart Outdoor Plug
- Cemetery: The light-up decorations are all connected using a 4-outlet outdoor smart plug. 3 tombstones go into one outlet and another 3 tombstones go into a second outlet.
- Tree, and Pumpkin: I ran an extension cord from a third outlet to the tree and pumpkin. All of this goes into one waterproof box and the tree and pumpkin connection goes into another waterproof box.
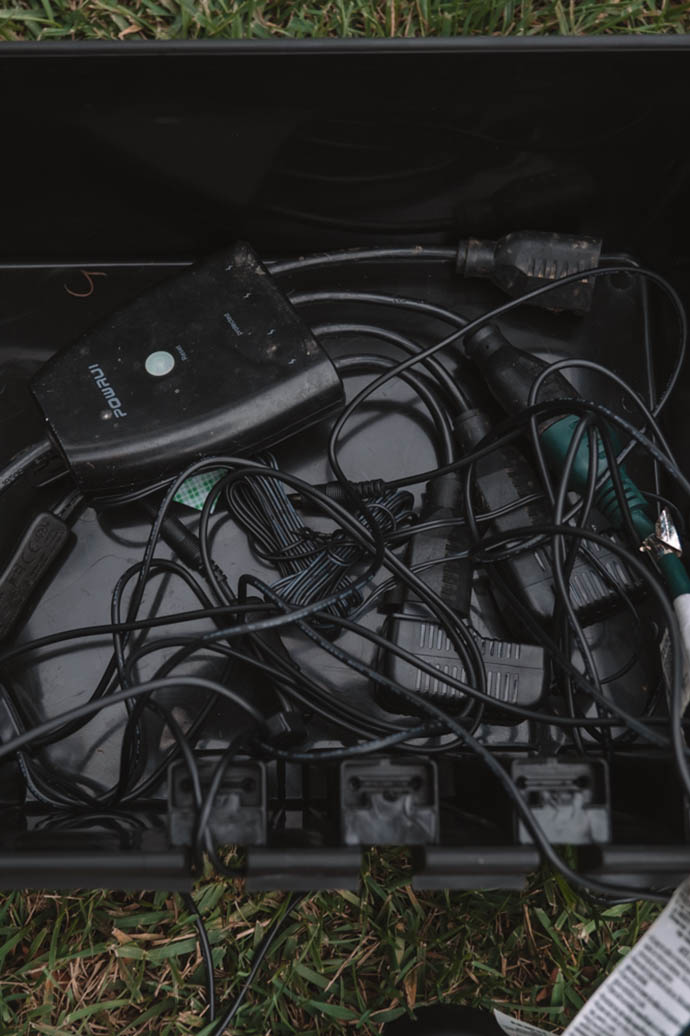
I’m all about automating things as much as possible. We have our entire setup on three extension cords. Here’s how they’re setup:

Since everything connects to the 4-outlet outdoor smart plug, I’m able to connect it to my Alexa app and can create a routine to turn the lights on and off at certain times automatically.
Dedicated Outlets: Make sure to use a dedicated outlet for the fog machine.
It’s really important you don’t overload plug points. We use two outdoor outlets and run the cemetery and tree light setup to one, and then a second outlet that we run a single extension cord to for the fog machine.
Waterproof Cable Box
All of the plugs run into a waterproof outdoor cable box. I have that all plugged into a smart outdoor plug connection so I can create timers and control everything from the Alexa App in my phone.
Waterproofing
Even though all of these items are made for the outdoors, it’s still good practice to seal off any openings that lead to electrical.
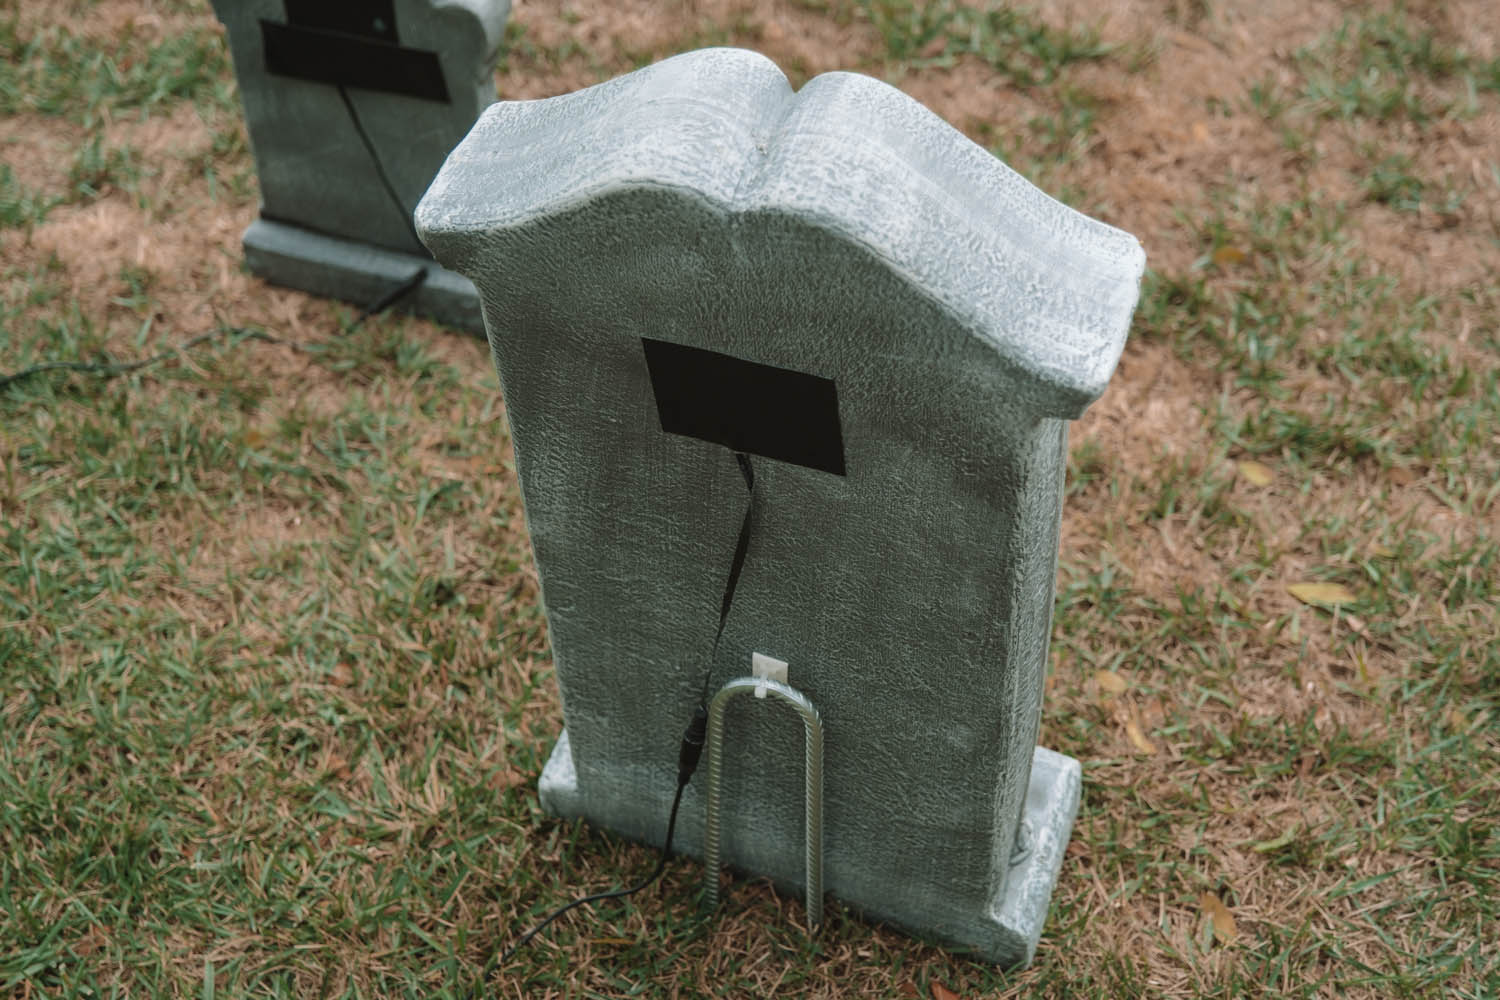
I used thick waterproof duct tape by Gorilla Glue, you could also use sealant tape. Basically, you seal the battery pack off and you can mark where the on and off buttons are located. Once you plug the cable adaptors in, make sure to wrap the connection with waterproof tape.
Make sure everything is watertight!
On the backside of some of the tombstones where I felt there might be weak points in the foam, I did a little duct tape reinforcement.
If you want to protect your outdoor decor even further, spray with Scotchguard UV and Waterproof spray. IMPORTANT: Test an area before you spray fully. And if you’re going to tape anything, be sure to do that before spraying with the Scotchguard. It adds a slick coating and nothing will stick to it once it’s sprayed.
Supporting the Gravestones with Stakes
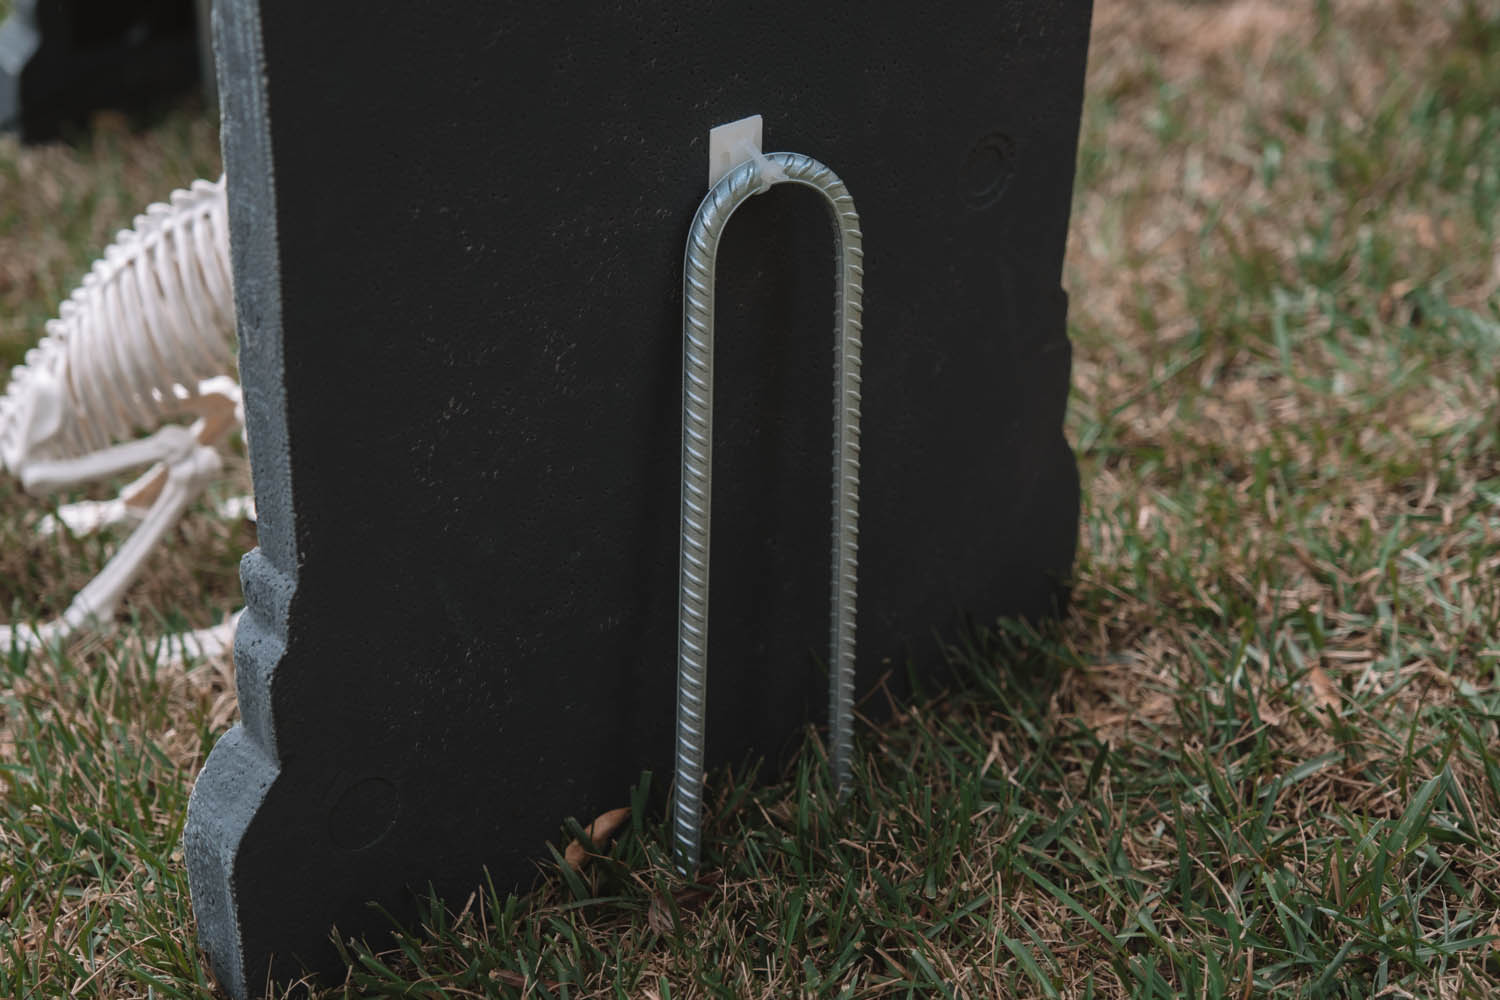
The stakes the tombstones came with are quite flimsy, so I bought 16-inch U-shape stakes on Amazon and used the sticky mount zip ties to tie them to the mounts. This way they don’t go anywhere, and helps them to have a bit more stability.
- Battery to Plug Adapters
- 4-Outlet Outdoor Smart Plug
- Waterproof Duct Tape by Gorilla Glue
- Waterproof Outdoor Cable Box
- U-Shape Stakes
- Sticky Mount Zipties
Shop Here!

Socially Distanced Trick-or-Treating
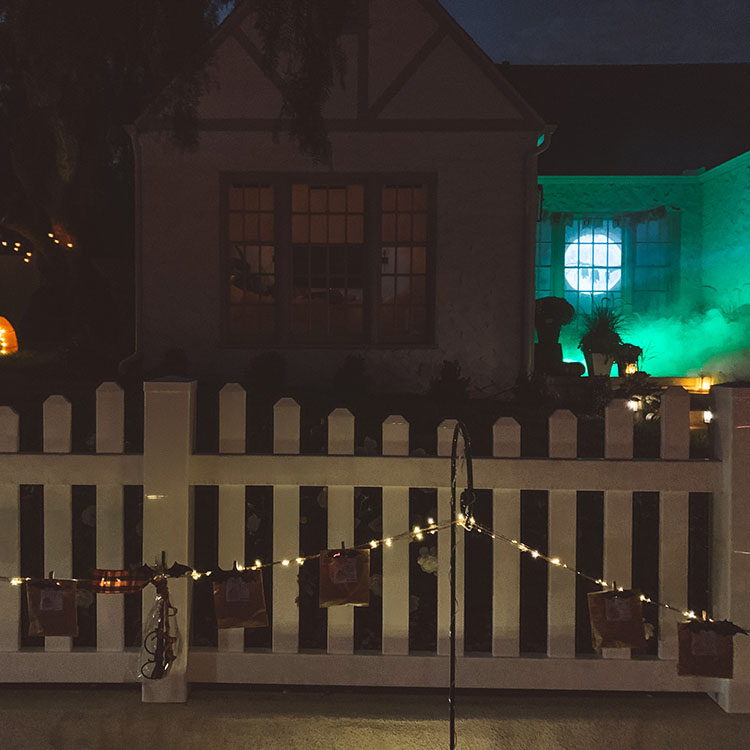
Last year, we fashioned a socially distanced Trick-or-Treating mechanism so kids could snag some goodies without having to come into our yard. To be perfectly honest, I’ll likely do this every year as we have a number of steps in our yard and I don’t want anyone to trip as they walk up.
The Candy Bags
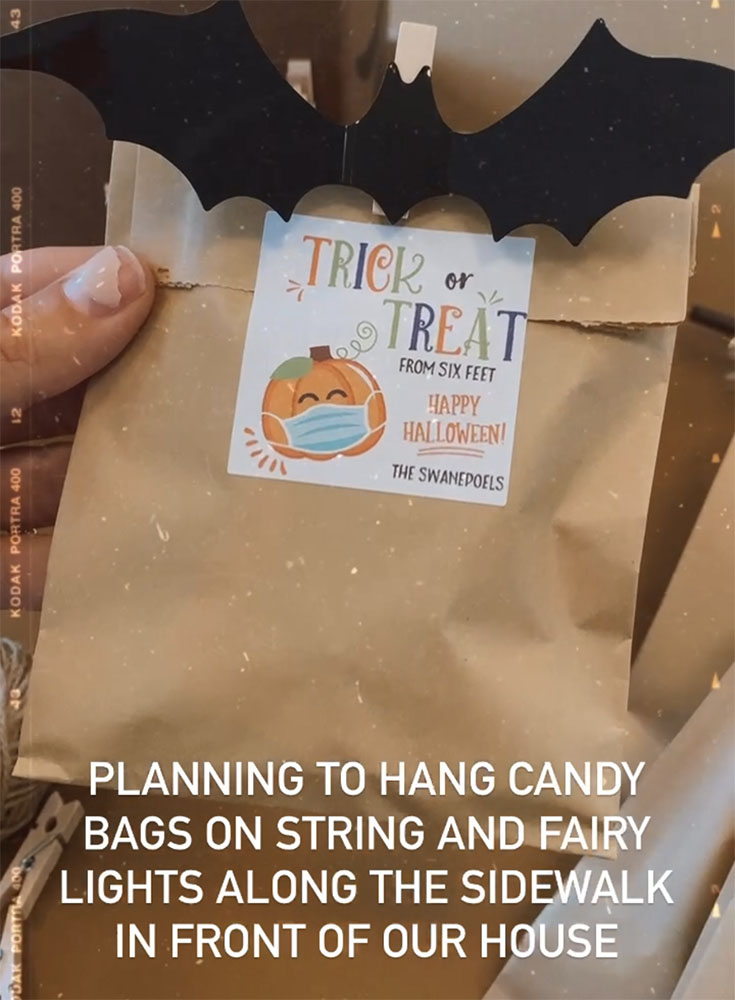
To create the candy bags, I took paper bags, mini clothespins, and printable label designs off Etsy (I love to support other creatives this way and small businesses this way!). Heads up, I did have to get creative in Photoshop to make sure the labels would be the correct size to print.
I filled each bag with two things of candy: Black Forest Organic Gummy Bears and Organic Allergy-Friendly Lollipops. I don’t have kids myself, but I have plenty of friends with allergies and I know how important it is to be aware that many kids have nut allergies. So I try to find organic and allergy-friendly options as much as possible.
I also bought little signs to string along from Etsy that said, “Trick or treat stay 6 feet!” I attached these along the string holding the goody bags, so hopefully, it was understood to take a bag.
Note: Please don’t download the image from my website, support the Etsy artist here!
Shop Here!
String everything on fairy lights hooked onto the shepherd’s hooks.
I would suggest solar uplighting to light up the string more or cheap reading lights to clip onto the instructional signs. A couple of families didn’t see the candy bags…granted we did have a lot of attention with the light show on our house.
Non-Candy Bags Options
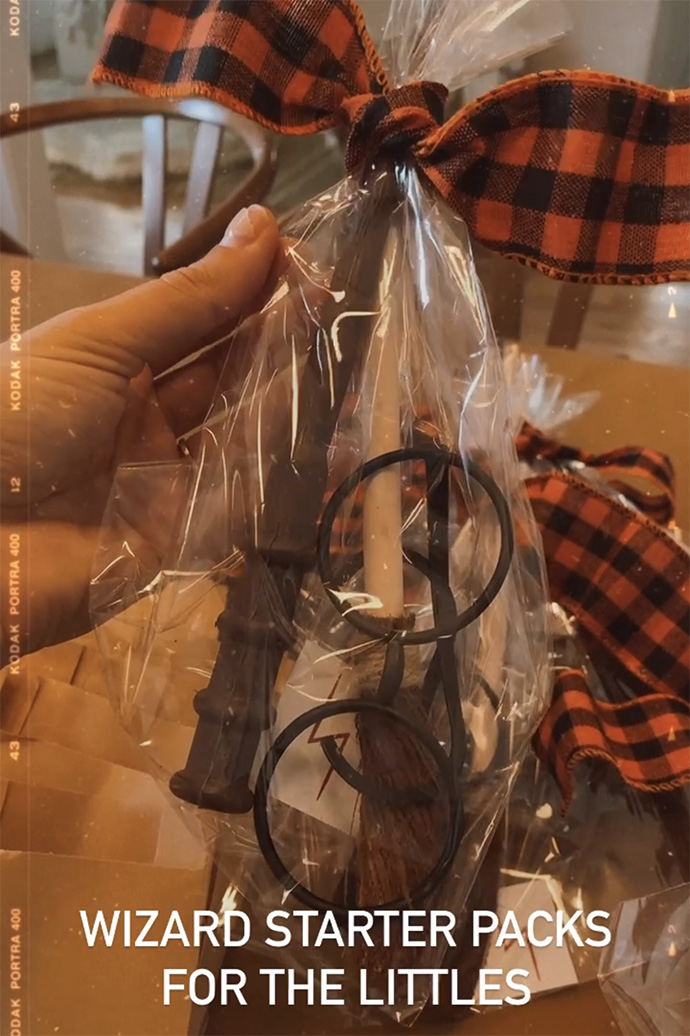
While I normally avoid single-use plastics, because of Covid and everything I wanted to have a clear bag for a toy option. So I bought a party favor set from Amazon that had some wizarding goodness like a wand. For those bags, I want the person to be able to see into the bag so they knew what was inside.
I also bought some wired ribbon to create a more wonky Harry Potter effect to the ribbon.

There you have it! That’s my ultimate guide to how we spookified our house for Halloween and how you can create a similar display!
I’d love to know how you get creative with decorating in the comments below.









This is so amazingly detailed, I loved reading every bit of it! Very clever for the 6 feet trick or treat bags. I’m shocked at how much work goes into making this beautiful Halloween display (the anchors at the back of the headstones even!). Thank you for posting!
Hi Christina! I’m so glad you enjoyed this 🙂 Happy Halloween!!
Oh my God!! You guys have taken so much efforts and done the decorations beautifully. I’m from India and although we don’t do the Halloween here, it was great knowing how y’all do it. Loved all the details and thought you have put in!!😇❤️Happy Halloween to you.
Hi Devki! A little Halloween obsessed here 😉