
You have probably heard the expression “the best camera is the one that you have with you,” and that’s especially true when you’re traveling. While I love my Fujifilm X-T2 and think that proper gear is worth the investment, it isn’t always practical to carry a camera 24/7.
I’ve actually gotten some of my favorite shots with my iPhone 7 Plus. While it’s not easy to get high-quality pics from a phone, especially in lower lighting, some simple tricks and accessories can seriously upgrade your photography.
Here’s my ultimate guide to smartphone travel photography!
Invest in Smartphone Photography Gear
If you want to get the best possible shots out of your smartphone, you need to make sure you’re using quality gear. I always invest in the best iPhone on the market to make sure that I don’t miss the perfect shot.
iPhone cameras also have so many accessories, and in my experience, a lot of them are totally useless. However, there are a few that are worth splurging on.
Here are my ride or dies that I take with me on every single trip:
External Lenses
At the moment, my favorite iPhone lenses are Pixter’s. They have a few pack options available, including one that is specifically designed for travel and one for “Photography Pros”. The Pixter Travel Pack comes with their flexible and versatile tripod as well as the Pixter Wide Angle Pro lens. If you’re looking for something ultra-lightweight, this is the way to go.
Portable Charger
When you’re on the road, you can’t always rely on a plug point to be available. If you’re visiting a destination that’s extremely hot or cold, your phones limited battery life is cut in half. Make sure you always have a way to charge your phone by bringing along a portable USB charger.
Waterproof Case or Pouch
I can’t tell you how many times my iPhone’s waterproof case has helped me take an epic shot when bringing along my DSLR wasn’t possible. If you’re going ocean kayaking, use a waterproof case with a lanyard that you can keep around your neck and quickly get to if you need to take a shot of some dolphins or the sunset.
Memory
There’s nothing worse than missing a shot because your phone’s memory is full. Make sure you’re always ready to shoot by investing in an iPhone that comes with 64GB or more. You’ll also want to take advantage of your iPhone’s iCloud storage to back up your photos!
Turn Grid Lines on
One of the fastest ways to upgrade every shot is to turn on the grid lines. Using these, you can incorporate one of the fundamental rules of photography: the rule of thirds.
The idea here is that you break each image down into thirds, both horizontally and vertically (you’ll get a visual of this as soon as you turn on the grid lines on your phone). Your goal is to keep your subject at the intersections or along the lines.
If you Google “rule of thirds,” you can find tons of samples showing comparison pics where the rule was applied and where it wasn’t. This will give you a clear idea of why it’s important.
To turn on the grid lines feature for your iPhone, go to Settings, click Photos & Camera, and switch Grid to on.
Lightroom Mobile
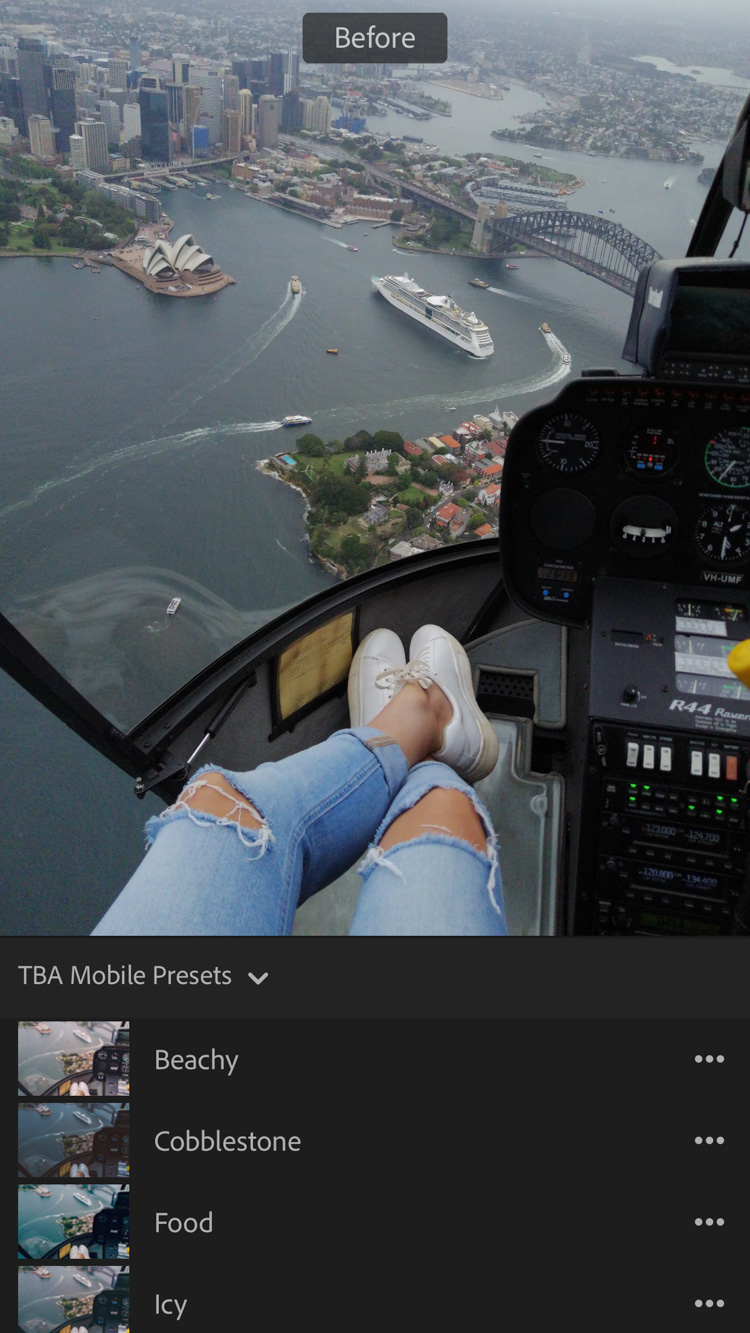
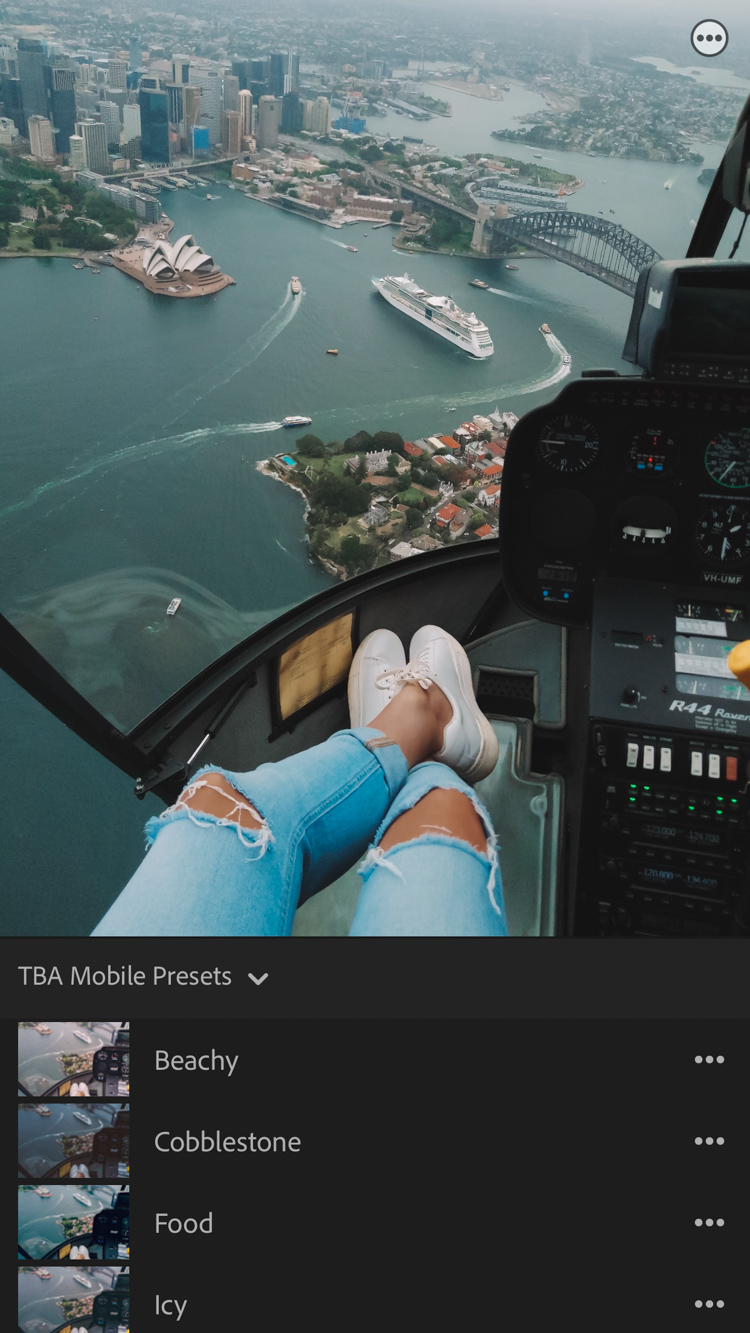
Taking the shot is just the first step in getting an amazing photo. I can guarantee you that ninety-nine percent of the gorgeous shots you have fallen in love with online have been edited.
When it comes to editing photos, less is often more. You don’t have to use crazy fillers (though they have their place too) or create an unnatural look. Just spend the time enhancing the natural beauty of your shot.
You want a final look that captures all of the rich shades and tones that you saw in person.
I will often edit my iPhone photos on my MacBook with my Lightroom Presets (when I have more time to edit), or I’ll use my Lightroom Mobile Presets for when I’m on the go and want a quick edit.
Investing in presets are an excellent way to get a consistent look on your Instagram feed!
Read More: Lightroom Presets x The Blonde Abroad
Don’t Zoom In
It’s tempting to zoom in, but don’t do it! Either physically get closer to your subject or plan to edit the shot later. Zooming in reduces the picture’s quality and creates a pixelated look.
Once you’ve zoomed in, you can’t fix the shot whereas a picture taken from farther away can easily be cropped.
Self-Shooting
It’s hard to shoot yourself on a phone unless you’re aiming for the ultimate selfie. I often travel alone and find that a phone tripod and Bluetooth remote is a cheap and easy-to-carry option. They are compact, and you can get your phone in and out quickly without damaging it.
Pixter’s flexible tripod will wrap around anything and everything, so it’s easy to get a good angle. Their Bluetooth remote control is reliable, and it comes with a travel-friendly carry pouch that you can fit into pretty much any bag.
But if you’re looking for a lightweight tripod that will work for your iPhone, DSLR, and GoPro – invest in a Gorilla Pod! It will easily fit in your bag and also can wrap around objects, helping you get the perfect shot!
Read More: How to Get Awesome Photos as a Solo Traveler
Shoot in Manual Mode
One of the main things that improved my travel smartphone photography game was learning how to shoot in manual mode. I downloaded an app called Halide that lets you take photos in RAW.
This means that you’re photos are taken in higher detail with lower noise.
Once you import the photo into Lightroom, you’ll have more control over your edits, and your pics will look sharper and more vibrant. Plus, the app helps you get that beautiful background blur or bokeh with just a tap of your finger!
Read More: The Best Travel Photography Apps
Do you have any travel photography tips for smartphones? Let me know in the comments below!





Thanks. I am starting out blogging, and it has been years since I took a photography course. I have a good cell phone that takes great pictures but I want to take my photography to the next level. This post gives me some ideas to test out and practice.
Hey Donna! Glad you found this post 🙂 If you have a DSLR camera to work with, you may want to check out this post about shooting in manual mode: https://theblondeabroad.com/beginners-guide-to-photographing-in-manual-mode/
The links to the iPhone lenses don’t come up when you hit them to Amazon! Do you have them or different ones? Thanks
Hi Rachel! Oh no, it looks like the link must have expired and needs to be updated — thanks for the heads up. Try this one: https://rstyle.me/+yi8v7xFDJzajSmCj8L6w-w